
Namecheap Accounts
The Namecheap Accounts section connects your Namecheap registrar account to PWA Hub via API - so you can register and manage domains right from the dashboard, without logging into the registrar's control panel every time. Enter your credentials once, and Namecheap domains become available in the same scenarios as all the others - when connecting them to PWA apps and splits.
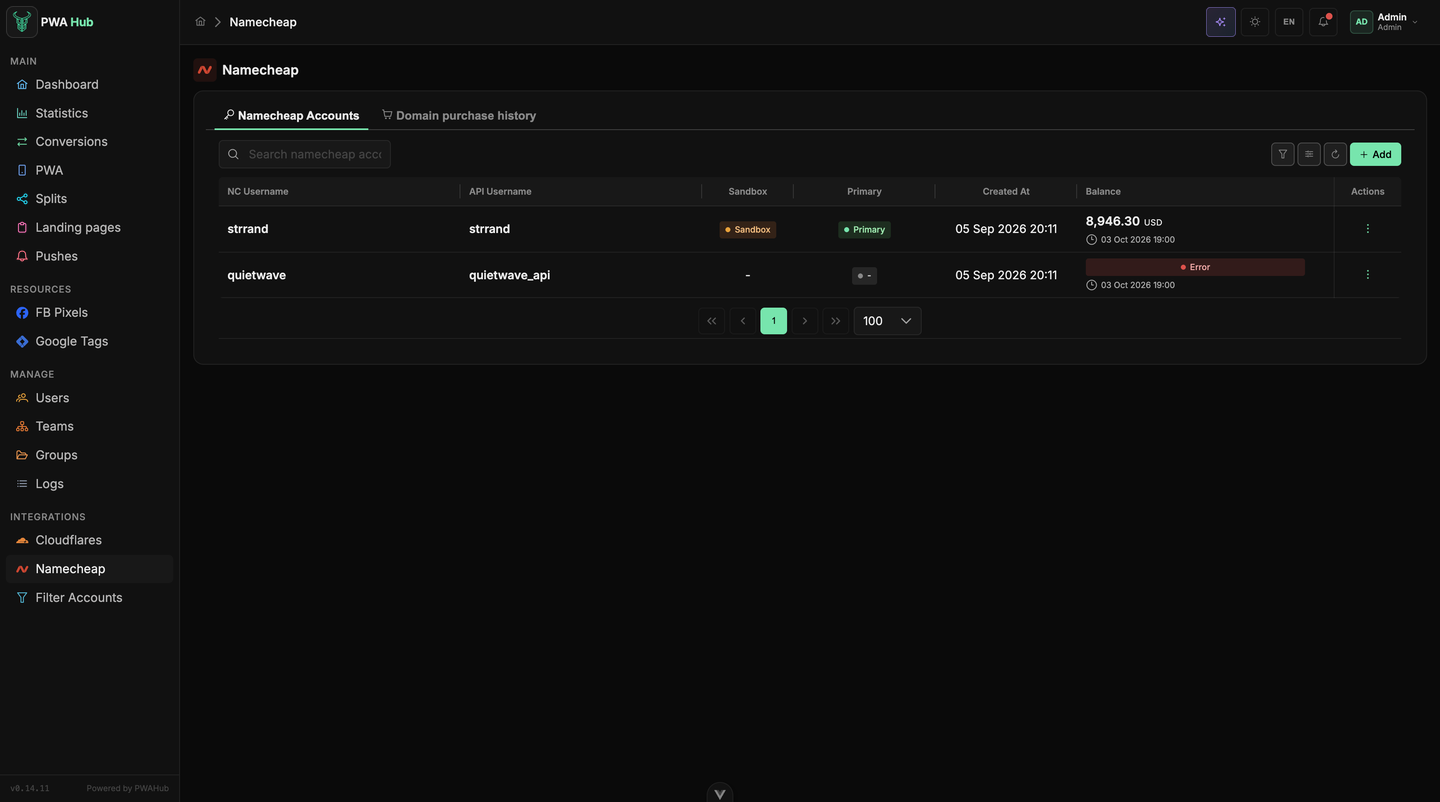
You can find the section in the left menu under INTEGRATIONS → Namecheap. Inside there are two tabs: Namecheap Accounts (the registrar accounts) and Domain purchase history (the history of purchased domains, see below). The accounts tab is laid out like the other lists: a search field at the top, the filter and column buttons, a refresh and a green Add button on the right, a table, and pagination. Which columns to show and in what order is up to you - the set is remembered for your account (see the "Interface" section). For each account, the table shows the following columns:
- ID - the internal identifier of the record.
- NC Username - the username of your Namecheap account.
- API Username - the API user's name (API User) from the Namecheap settings.
- Balance - the account's current balance with its currency and an "updated …" caption; real money is charged from it when buying domains. If Namecheap returns an error (for example, invalid keys), a red Error marker is shown instead of the amount.
- Sandbox - a marker for a test (sandbox) account: it has its own keys and a separate URL, and its purchases are virtual.
- Created At - the date and time the account was added.
- Primary - the primary account marker.
- Actions - the "⋮" menu for the row: Sync balance (refresh the balance right now instead of waiting for the hourly update), Sync domains (import the domains the account already owns into the purchase history - handy after moving from another panel), Fetch contacts (pull the registrant contacts from the account itself), plus edit or delete the record.
The balance is pulled automatically (once an hour) and after every purchase. The refresh button (⟳) above the table recalculates all account balances manually - handy right after you enter or fix the keys.
What to prepare in Namecheap
Before adding an account to the dashboard, enable API access on the Namecheap side. Here's the order:
- Enable API access in your Namecheap account.
- Add your server's IP to the whitelist (the list of allowed addresses) - without this, requests from the dashboard will be rejected.
- In the API section, grab the API Key and API User values - you'll need them when adding the account.
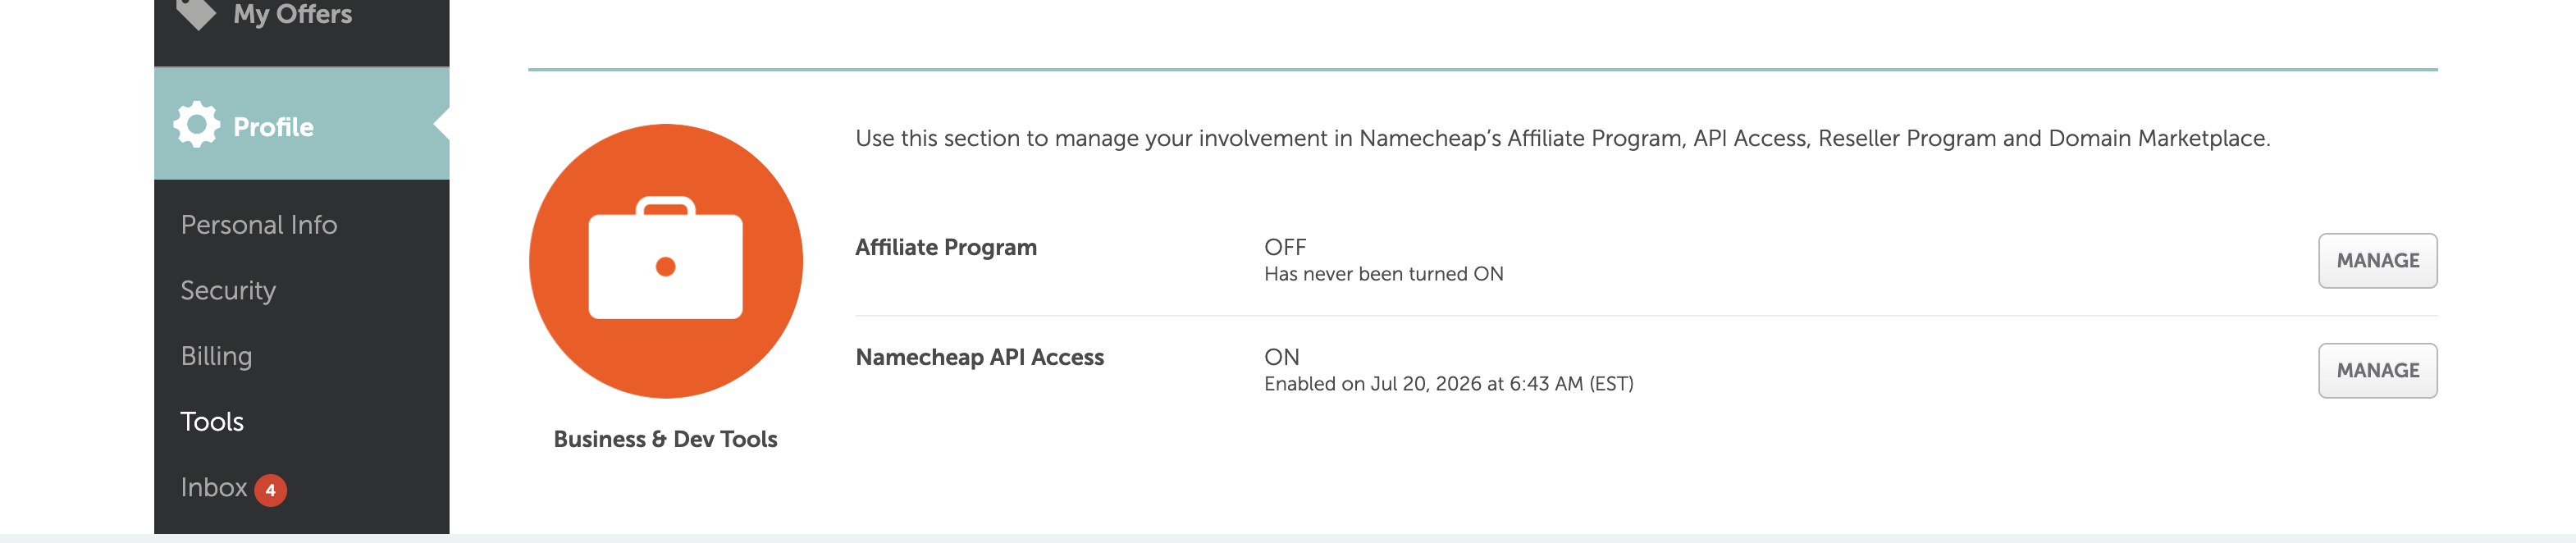
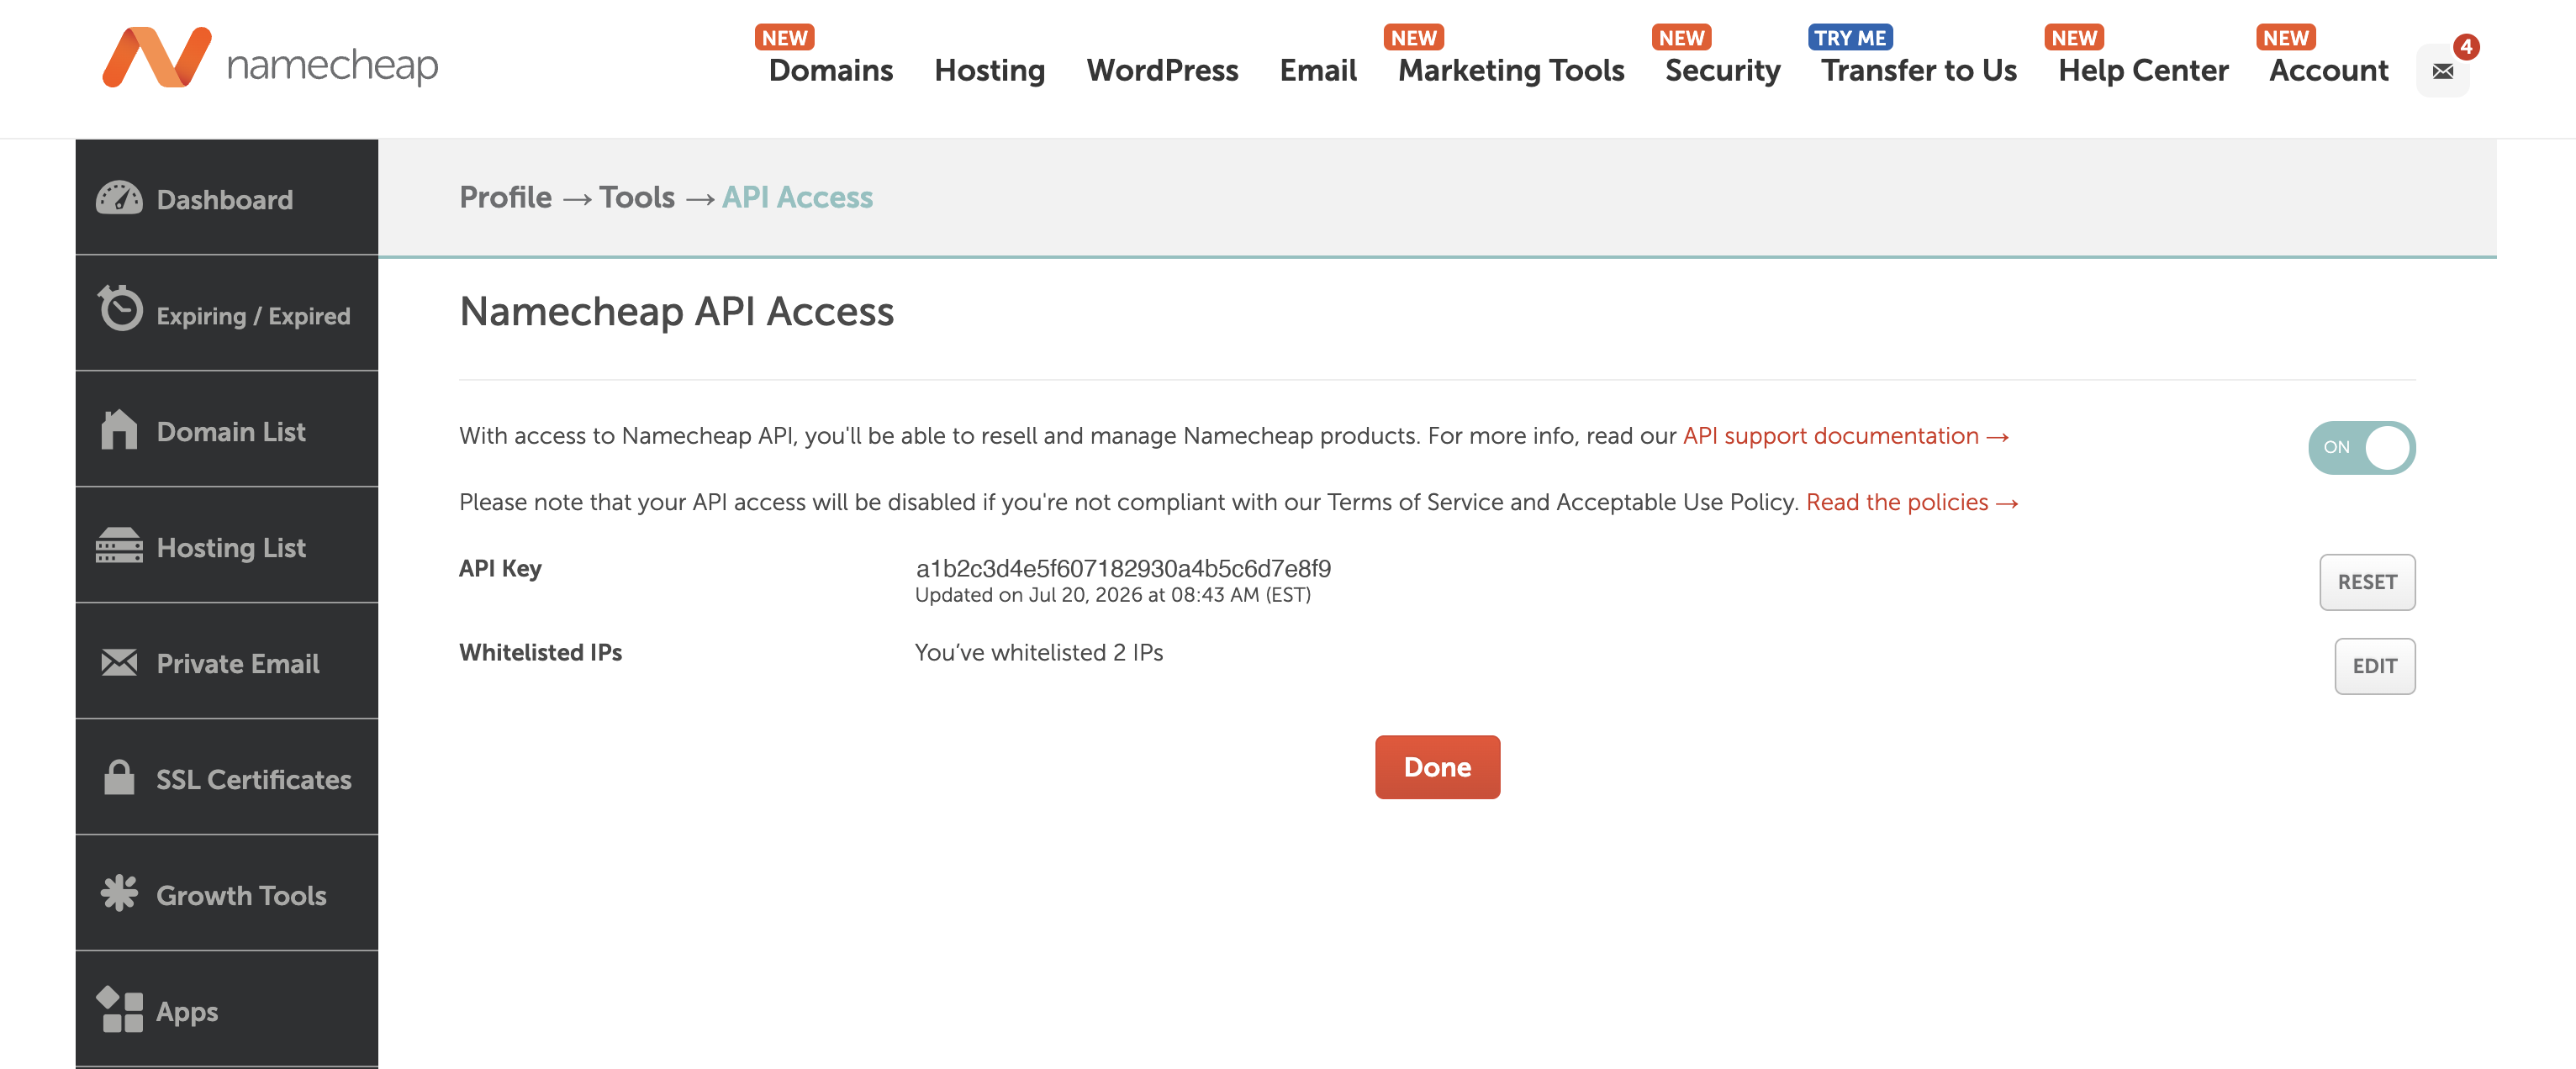
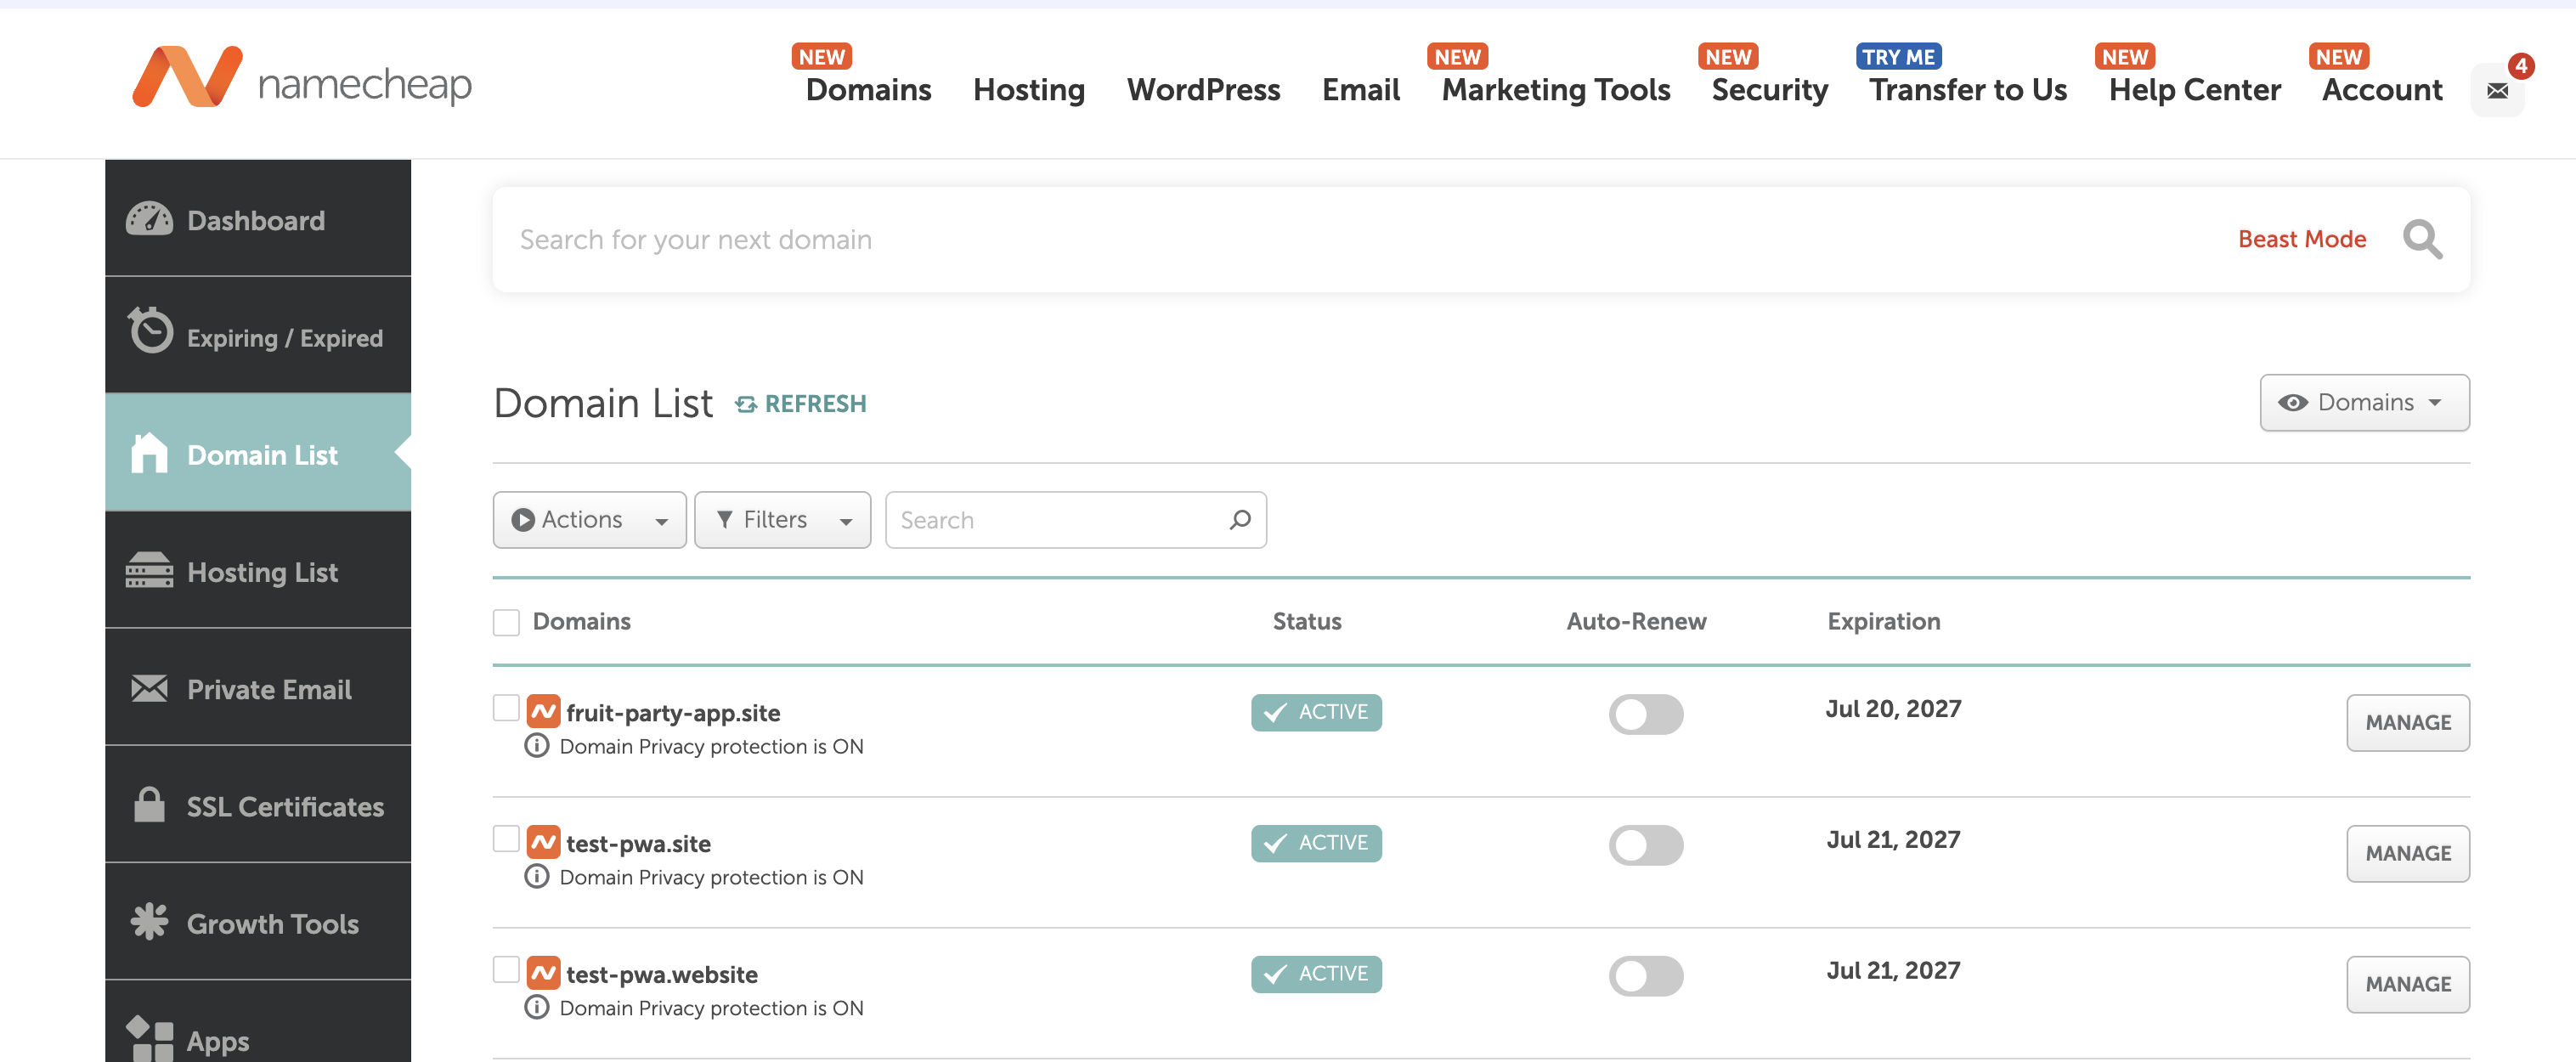
Enable API access in advance
On Namecheap, API access is granted upon request and after you meet their conditions. Set it up ahead of time so you're not waiting for activation at the moment you already need the domains. For the full list of what's worth preparing before you start, see the "Requirements and Preparation" section.
Adding an account
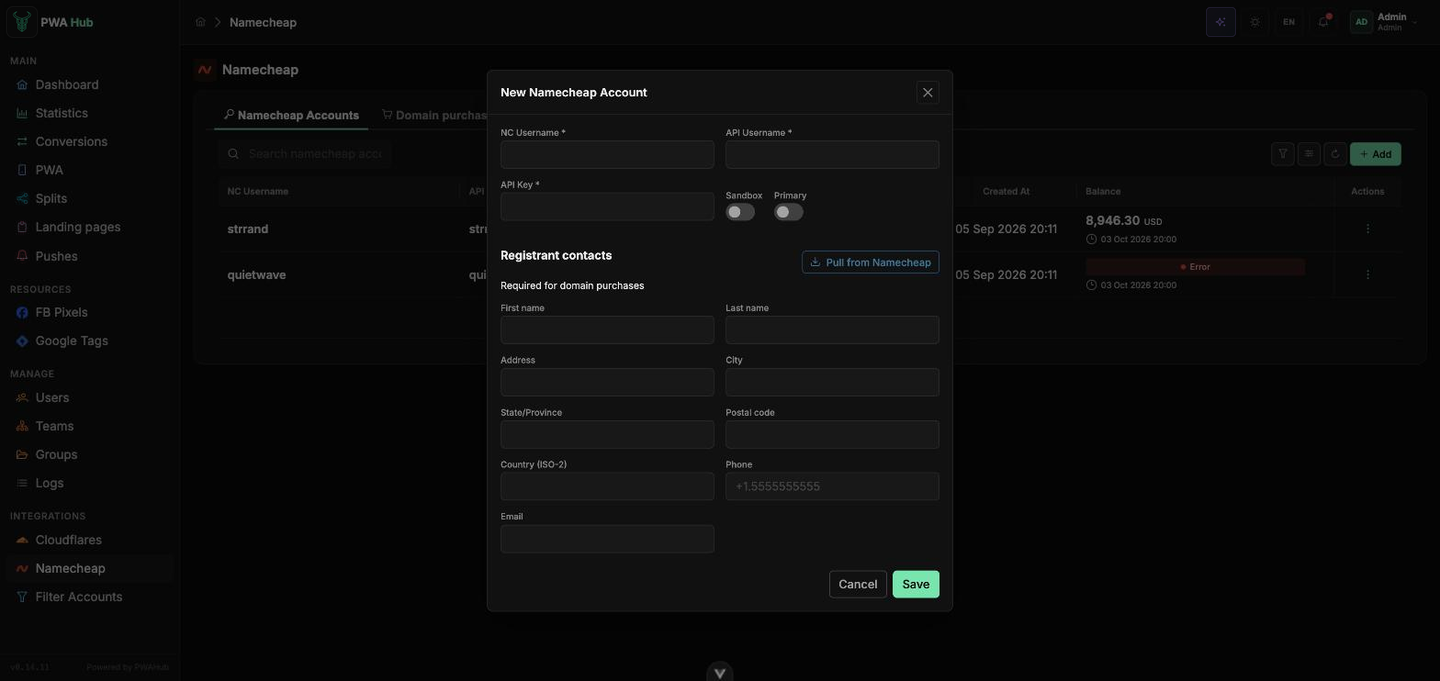
- Click the Add button in the top right - the New Namecheap Account window opens.
- Fill in the fields:
- NC Username - the username of your Namecheap account.
- API Username - the API user's name (API User) from the Namecheap settings.
- API Key - the API access key.
- Sandbox - a toggle: a test account (requests go to Namecheap's sandbox address).
- Primary - a toggle: make the account primary.
- Below is the Registrant contacts block: first and last name, address, city, state/province, postal code, country (ISO-2), phone in the
+NN.NNNNNNNNNNformat, and email. These details are required for domain purchases - Namecheap won't register a domain without complete contacts. The Pull from Namecheap button fetches the contacts from your registrar account so you don't have to type them in by hand. - Click Save to save the account, or Cancel to close the window without changes.
Saving does not contact Namecheap
When you save, the dashboard only checks that the fields are filled in and stores the credentials on its side - no request to Namecheap is made at this step, so a save can't fail because of the whitelist or API access. This section just keeps the registrar credentials: enabled API access and a whitelisted server IP will be needed later, when actually working with Namecheap domains.
Primary account
As with the other integrations, only one account can be primary - it's the one used by default when you don't explicitly choose which account to work through. You can switch the primary one right in the list: click the marker in the Primary column of the row you want.
You can connect several accounts - for example, to distribute domains across them - and make the one you work with most often the primary.
Domain purchase history
The section's second tab - Domain purchase history - gathers every domain bought through Namecheap right from the dashboard. Above the table are a search by domain, a refresh button and the filter popover: period (with an All time option, which is the default here), the purchase status and the account it went through.
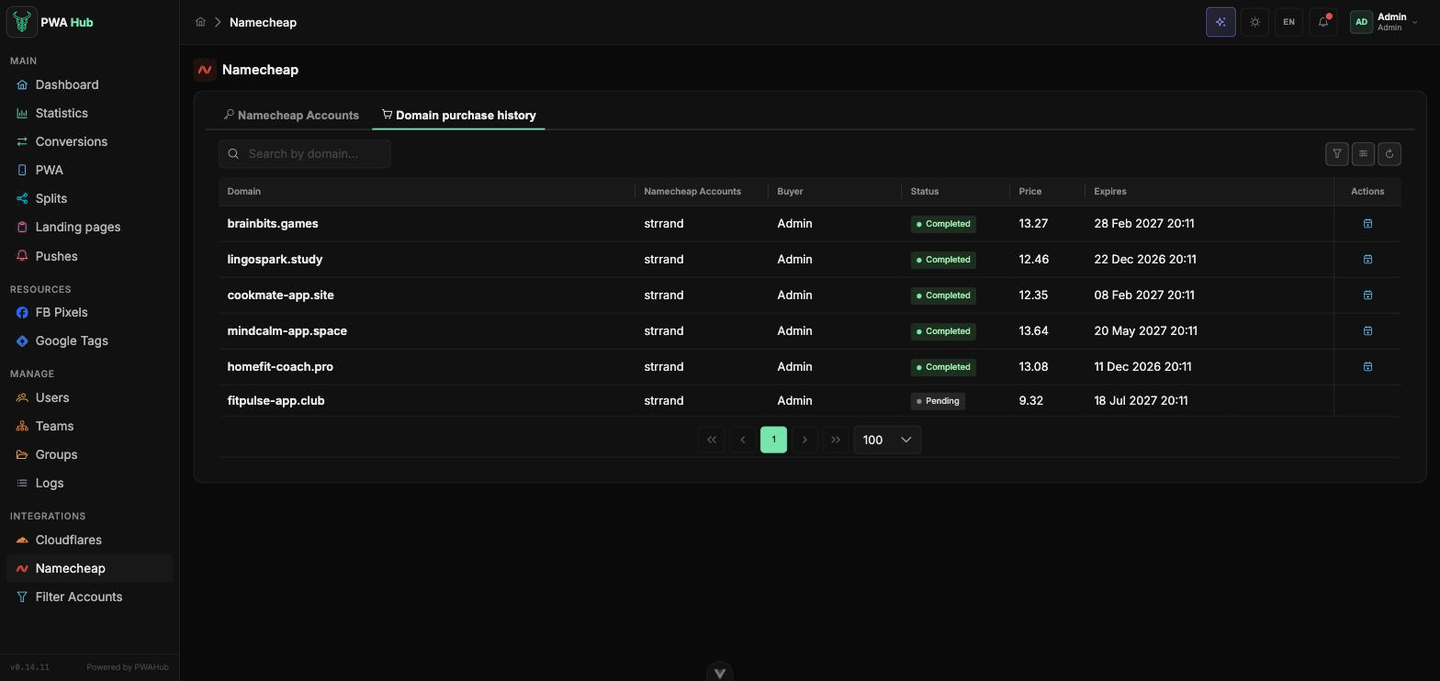
Table columns:
- Domain - the purchased domain.
- Namecheap Accounts - the account whose balance was charged.
- Buyer - who initiated the purchase (Admin or the buyer's name; - for a global purchase).
- Status - the purchase stage: completed (domain bought, zone and NS set up), purchased (money charged, but setup didn't finish - the purchase can be "resumed" by repeating the action), failed (didn't go through, no money charged), and pending (in progress).
- Price - how much was charged for the registration.
- Expires - when the domain's registration expires; rows with a near date are worth renewing ahead of time.
- Actions - renew the domain using the same account.
Buying a domain - from a PWA or split card
You start the purchase itself when connecting a domain (the "Buy new" mode in the domains block of a PWA or split) - that's where you pick the term and see the price. This tab is for viewing the history, resuming stuck purchases, and renewing domains.
How this relates to the other sections
A Namecheap account is a source of registrar domains. You connect the domains themselves to apps in the "PWA Apps" section, while DNS and proxying are handled by the integration in the "Domains and Cloudflare" section. Shared keys and dashboard credentials live in the "Settings" section.