
Settings
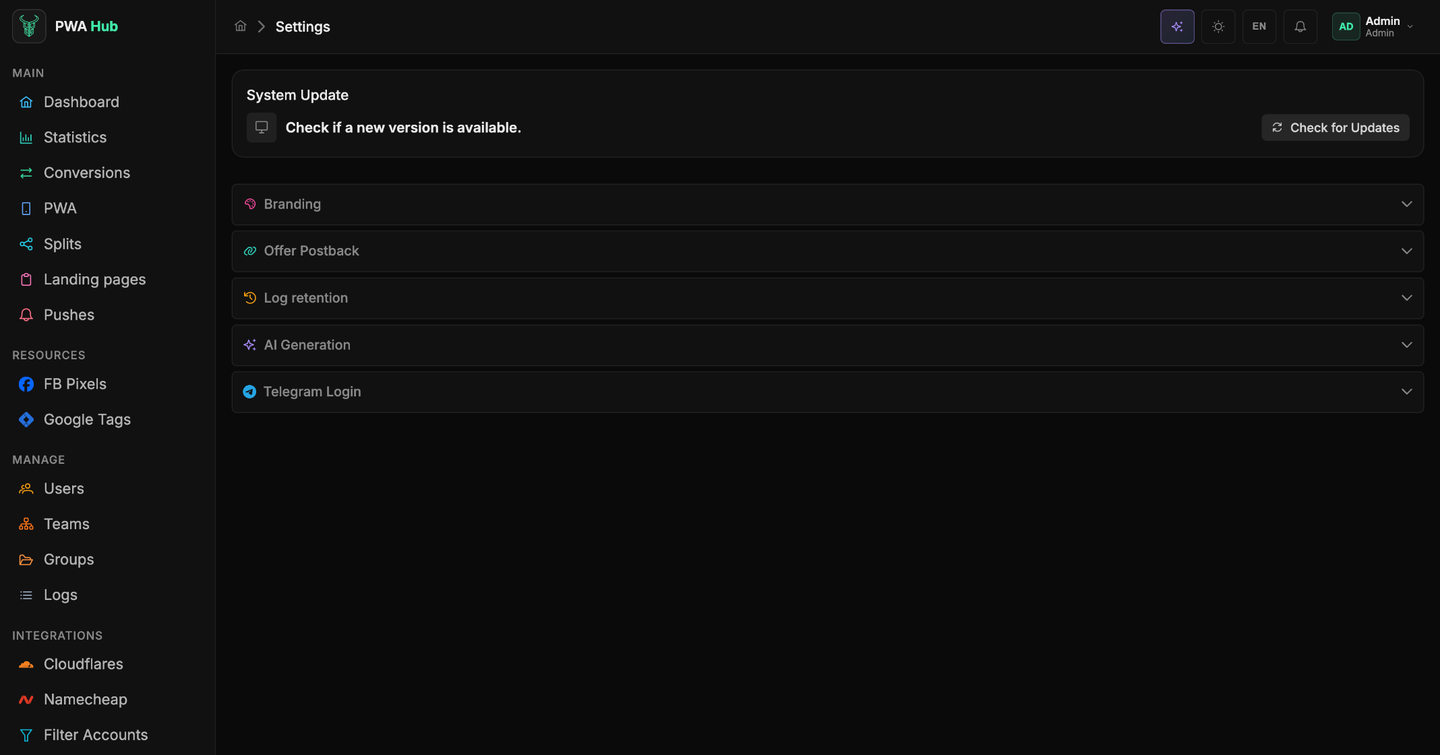
Settings is the master switchboard of your PWA Hub instance, a page for administrators only (opened via the menu in the top-right corner → Settings). From here you keep the system on the latest version, give the panel your own name and logo, hand affiliate networks the postback address, manage how long logs are kept, connect a language model and enable Telegram login. At the top is the System Update card, below it the collapsible Branding, Offer Postback, Log retention, AI Generation and Telegram Login sections.
Personal settings live in the profile
Everything that concerns you personally - your name, password, Telegram link, silent notifications, and your key to the public API - lives on the Profile page (the menu in the top-right corner → Profile). Here in Settings it's only what affects the whole instance.
System Update
The most useful card for anyone running PWA Hub on their own server: updating to a fresh version right from the interface, without SSH or the command line. It all takes just a few clicks.
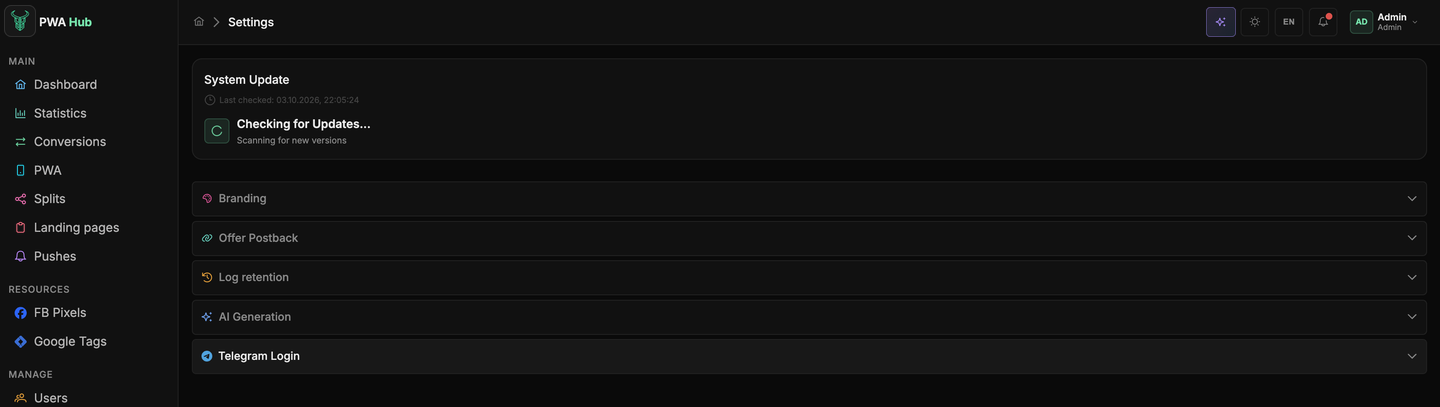
1. Check for updates. Click Check for Updates - the dashboard will contact the update server and show whether your version is current. The Last checked marker is always visible next to it - the time of the last check.
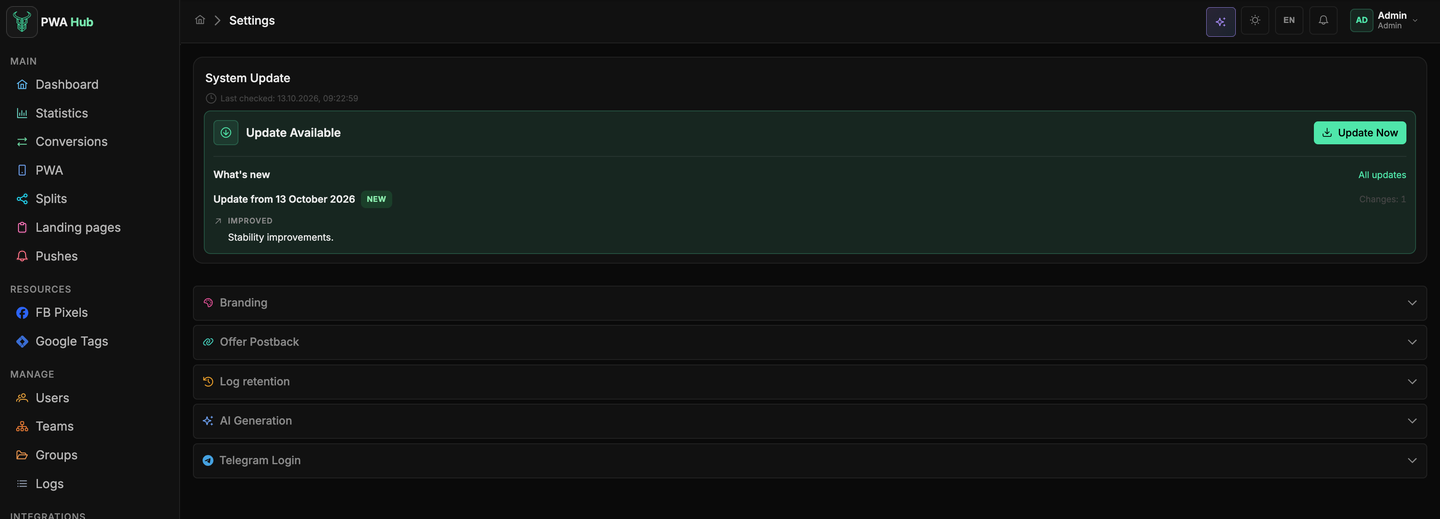
2. If a new version is out, a green Update Available banner appears with an Update Now button. Below it is what the update brings: the date, the number of changes and the list grouped into Security, New, Improved, Fixed, in the panel's language. The All updates link opens the full history - the "What's new" section of this documentation.
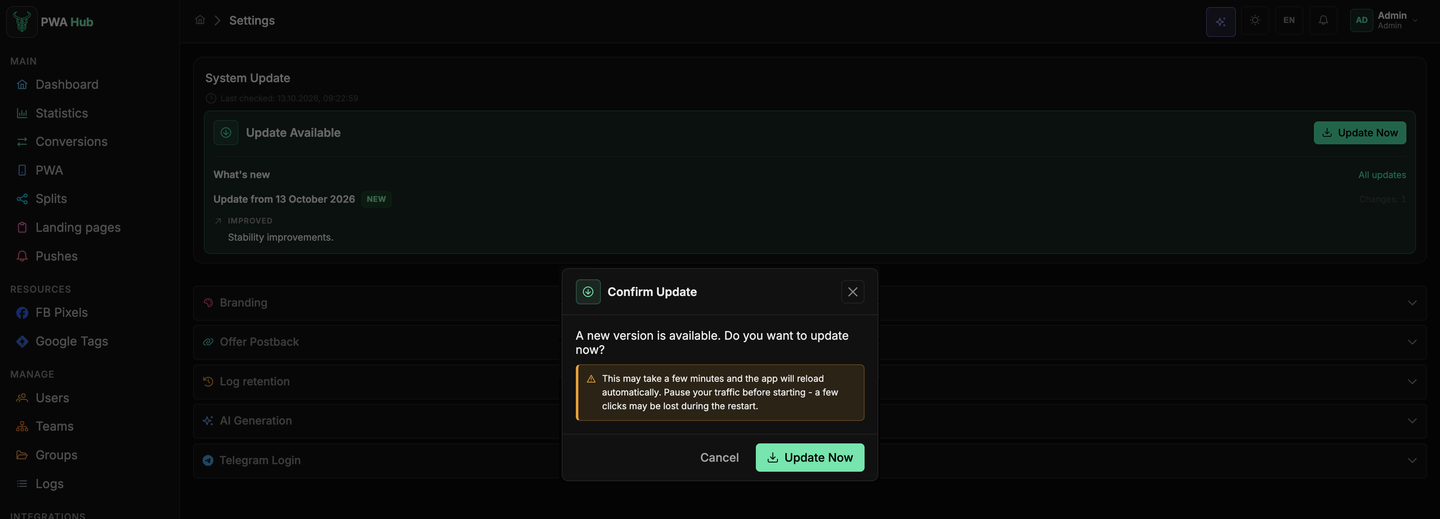
3. Confirm. The Update Now button opens the Confirm Update window - click Update Now in it. The update will take a couple of minutes, and the app will restart on its own.
4. Wait for the install. PWA Hub downloads and installs the new version, showing progress step by step (Preparing, Downloading, Finishing up) and a bar for downloading images - how many are already fetched (for example, 8 of 13) and the overall percentage.
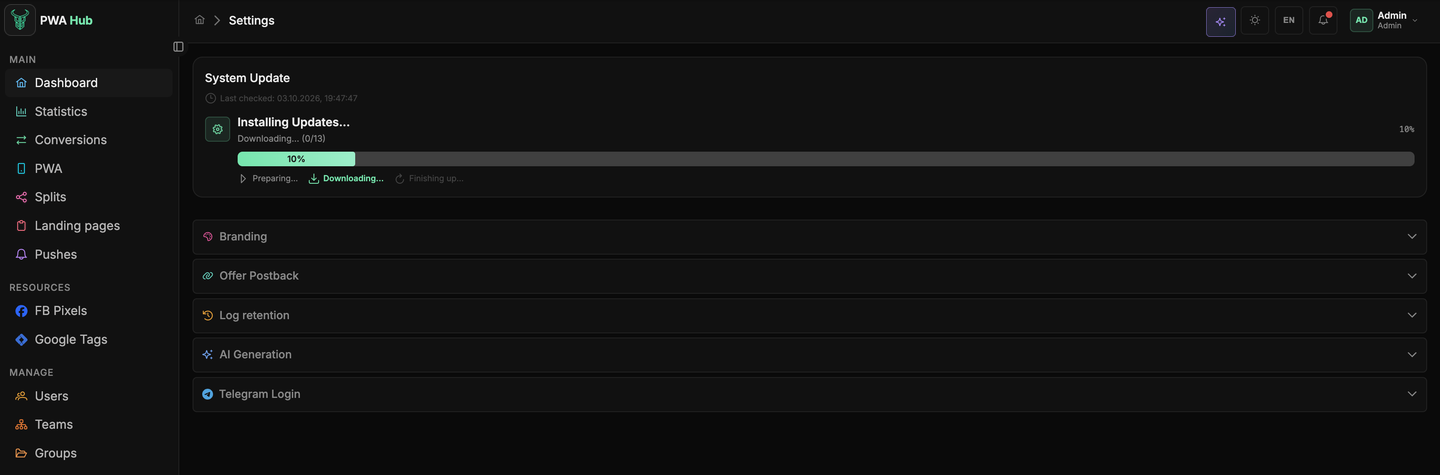
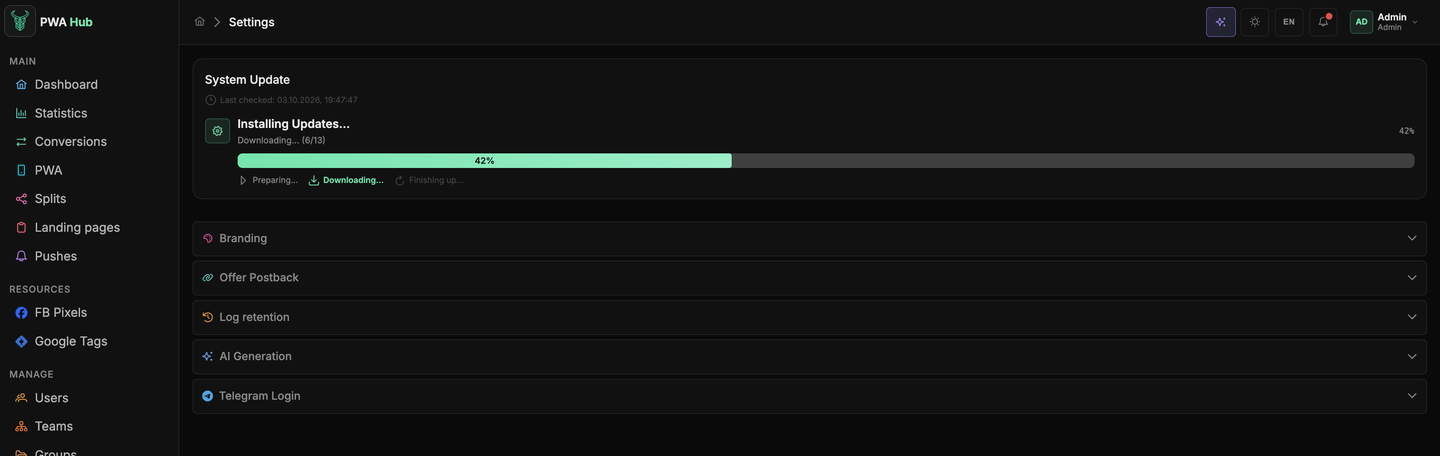
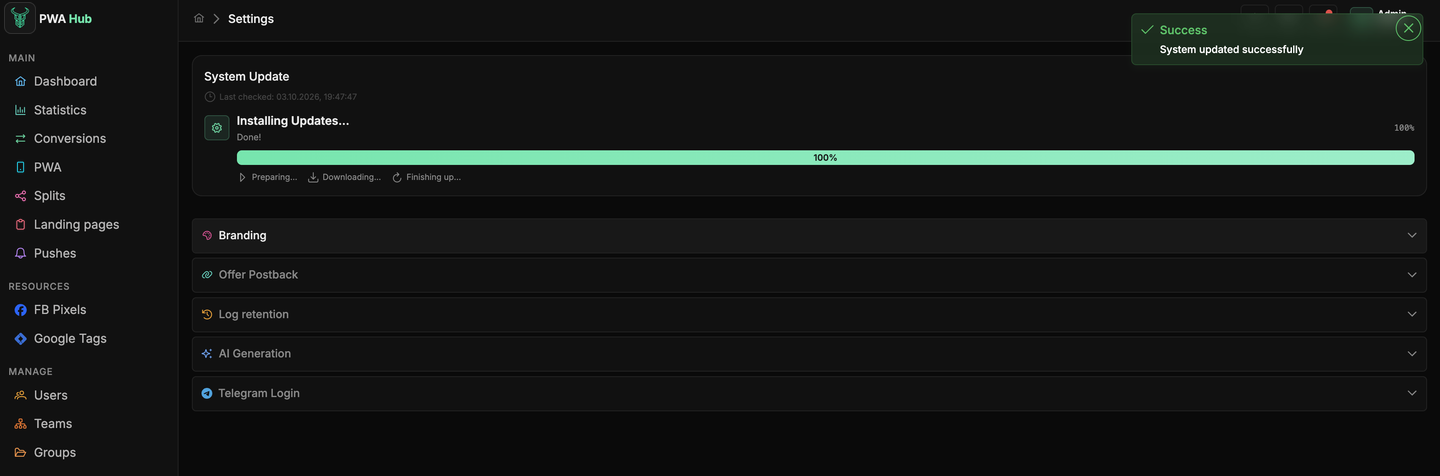
5. Wait for the hundred percent. At the finish the card shows Done!, and a toast pops up in the top right corner - System updated successfully.
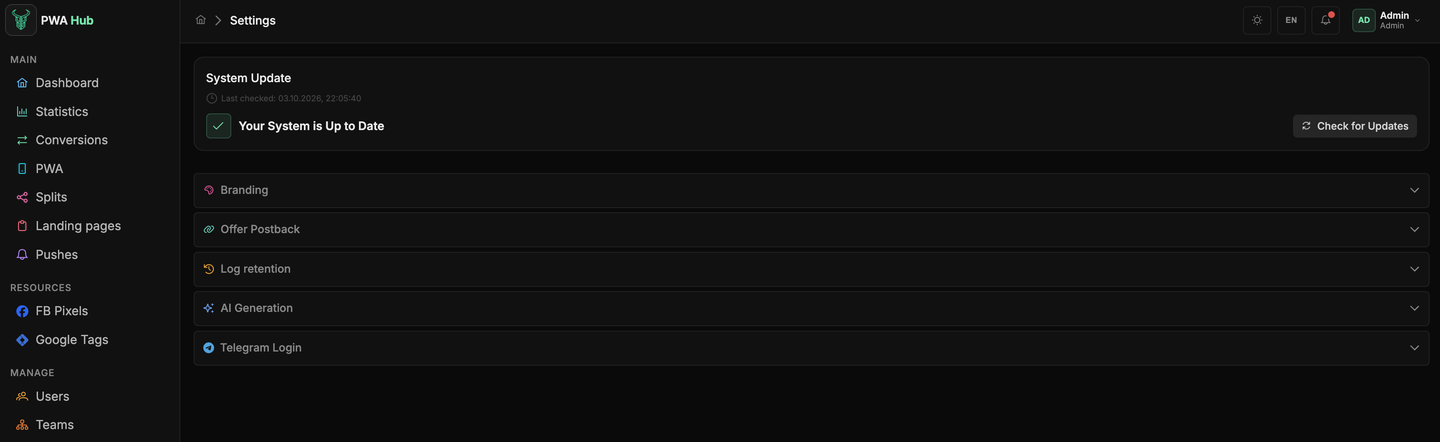
6. Done. The page refreshes itself, and the card shows Your System is Up to Date.
Update didn't go through?
If the card shows Update Failed, the running version stays as it was - nothing is broken. New versions are downloaded only with an active license: check it in the "License" section. If the license is fine, click Try Again a bit later.
Automatic checks
The dashboard also checks for updates periodically on its own - on a schedule on the server side. When it last did so is shown in the Last checked line. You only need the Check for Updates button if you want to check right now.
Pause your traffic before updating
Any update restarts the services. The restart takes a fraction of a second, but during that moment a few clicks landing on your PWAs can be lost. So pause your traffic (campaigns at the sources) before starting an update, and run it during off-peak hours rather than in the middle of active work.
What happens during installation
While the install is running, the app restarts - it's normal for the interface to "freeze" for a minute. Don't close the tab: wait for it to finish, and the page will refresh itself. If the connection drops for a second, PWA Hub will pick the update status back up after reconnecting.
Branding
The Branding section lets you name the panel your way and replace the logo and the tab icon - no rebuild, no file editing. The only thing that stays is the Powered by PWAHub link at the bottom of the sidebar.
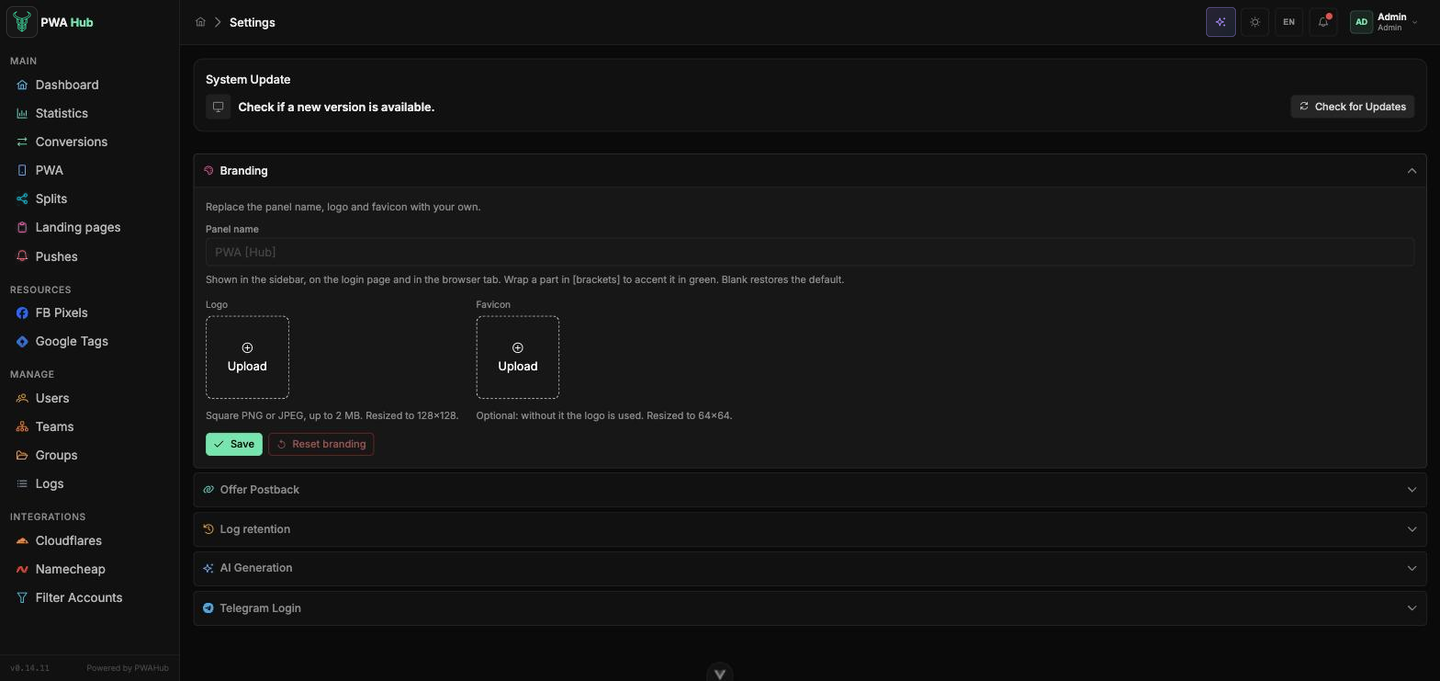
- Panel name - the name shown in the sidebar, on the login page and in the browser tab title (up to 40 characters). The part in square brackets gets the green accent - the stock PWA [Hub] is written exactly like that. A blank field restores the default name.
- Logo - a square PNG or JPEG up to 2 MB; the panel shrinks it to 128×128 and pads a wide image with transparent margins instead of cropping.
- Favicon - the tab icon, also PNG or JPEG up to 2 MB, shrunk to 64×64. Optional: without it the logo doubles as the favicon.
Click Save to apply, or Reset branding to bring back the default name and images. SVG is refused on purpose - raster formats only.
Offer Postback
The Offer Postback section shows the address you hand to an affiliate network so it can report registrations and deposits back to the panel. These postbacks are what conversions in the statistics, triggered pushes and the server-side Facebook events are built on.
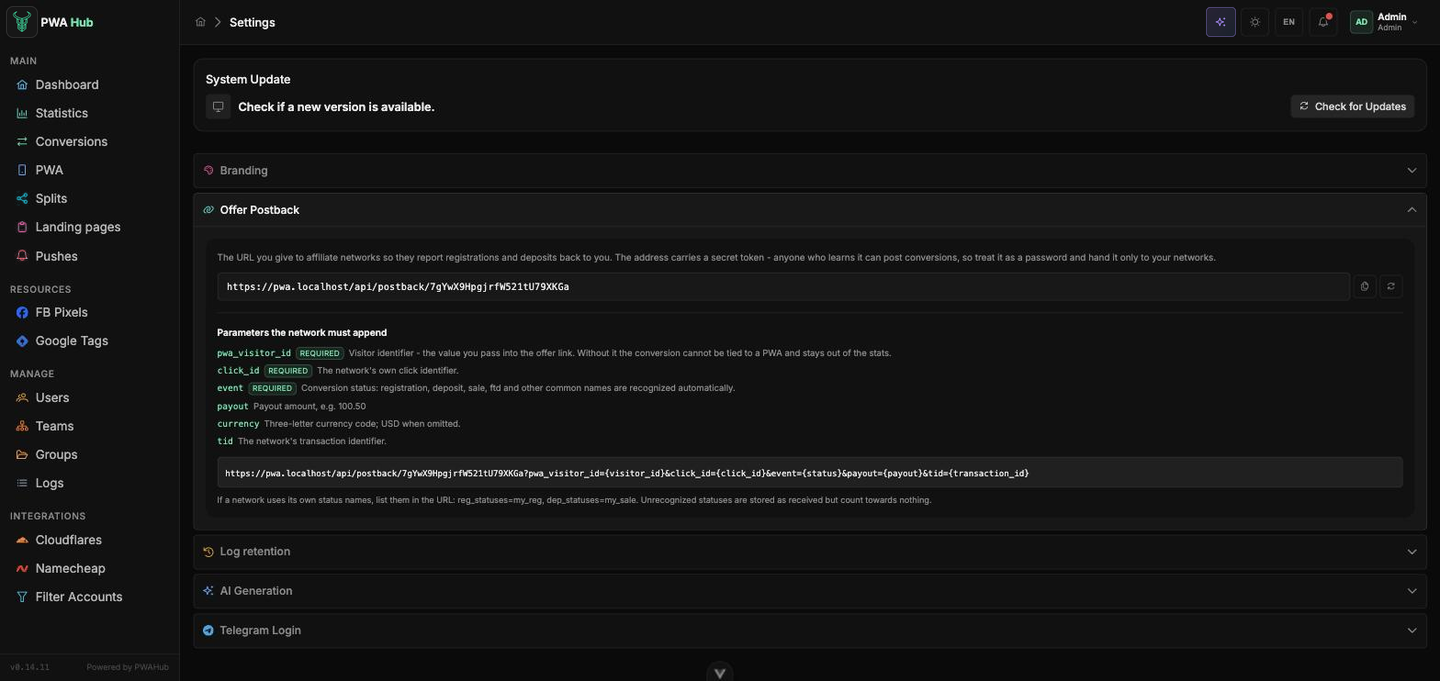
The address carries a secret token. Anyone who knows the address can post conversions, so treat it like a password and give it only to your networks. The button next to it copies the address; the refresh button generates a new token.
A new token breaks the old links
After regeneration the previous address is no longer accepted. Every network where it is already configured has to be updated by hand - otherwise their postbacks start getting lost.
Parameters the network has to append to the address:
| Parameter | Required | What it carries |
|---|---|---|
pwa_visitor_id | yes | The visitor identifier - the value you passed into the offer link with the {VISITOR_ID} macro. Without it there is nothing to tie the conversion to, and it stays out of the statistics. |
click_id | yes | The network's own click identifier. |
event | yes | The conversion status. Common names - registration, deposit, sale, ftd and others - are recognised automatically. |
payout | no | The payout amount, e.g. 100.50. |
currency | no | A three-letter currency code; USD when omitted. |
tid | no | The network's transaction identifier. |
A ready example link with macros is shown in the card itself - replace {visitor_id}, {click_id}, {status} and the rest with your network's macros. If the network uses its own status names, list them right in the address: reg_statuses=my_reg, dep_statuses=my_sale (and redep_statuses for repeat deposits). An unrecognised status is still stored but counts towards no funnel step.
When conversions don't arrive
Every received postback is written to Logs with the Postbacks type together with the parameters as they came in. Open it and check: is pwa_visitor_id there, is the status recognisable.
Log retention
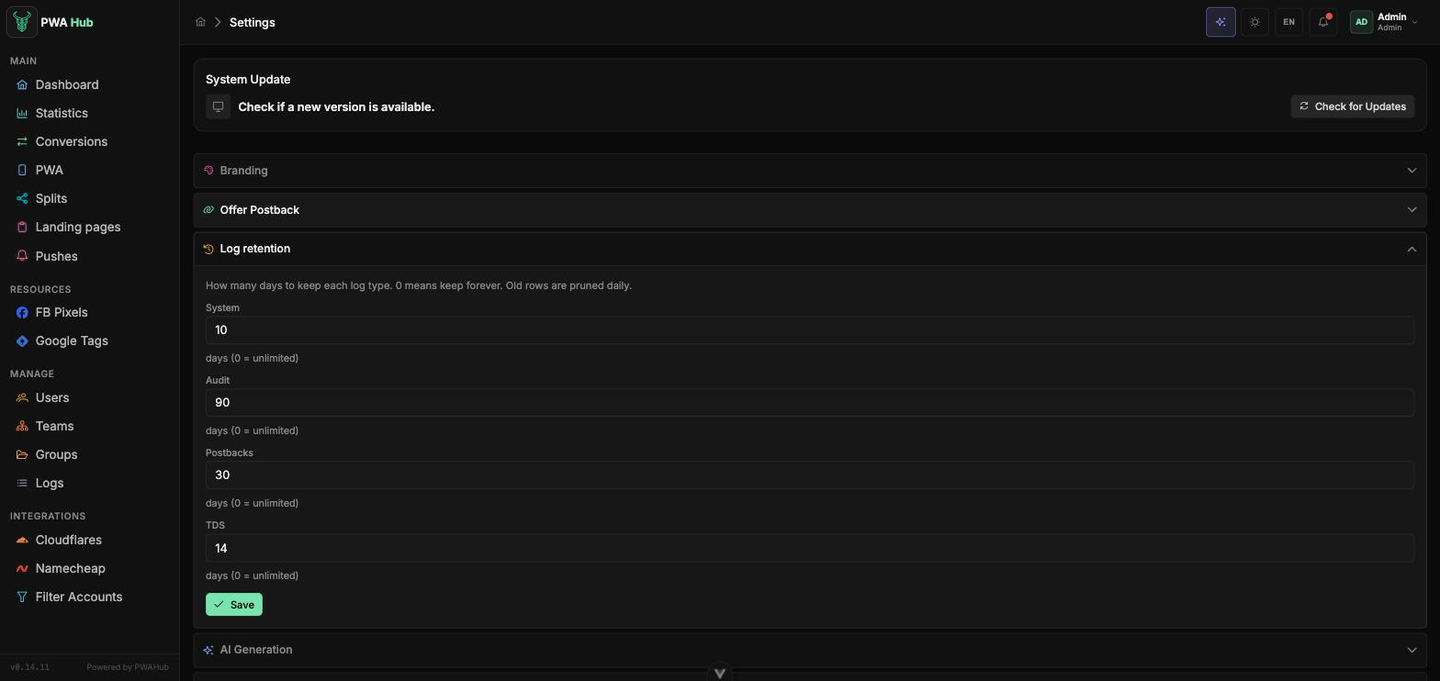
The Log retention section sets how many days to keep each record type of the Logs section: System, Audit, Postbacks and TDS. Old records are removed once a day; the value 0 turns the cleanup off for that type. By default system and TDS records live for 14 days, the audit for 90, postbacks for 30. Click Save to apply.
AI Generation
The AI Generation section connects a language model that writes for you: it uniqueizes push texts (the Messages tab of the push form), writes push chains (Chain from AI on the Pushes page), generates reviews (the Comments tab of the PWA form), translates the storefront, fills it from an offer (Fill from offer on the Description tab) and makes the texts of clones unique. Requests run through your provider account - create an API key in the OpenAI, Google AI Studio or Anthropic console. The same model answers in the AI assistant chat - see the AI assistant section.
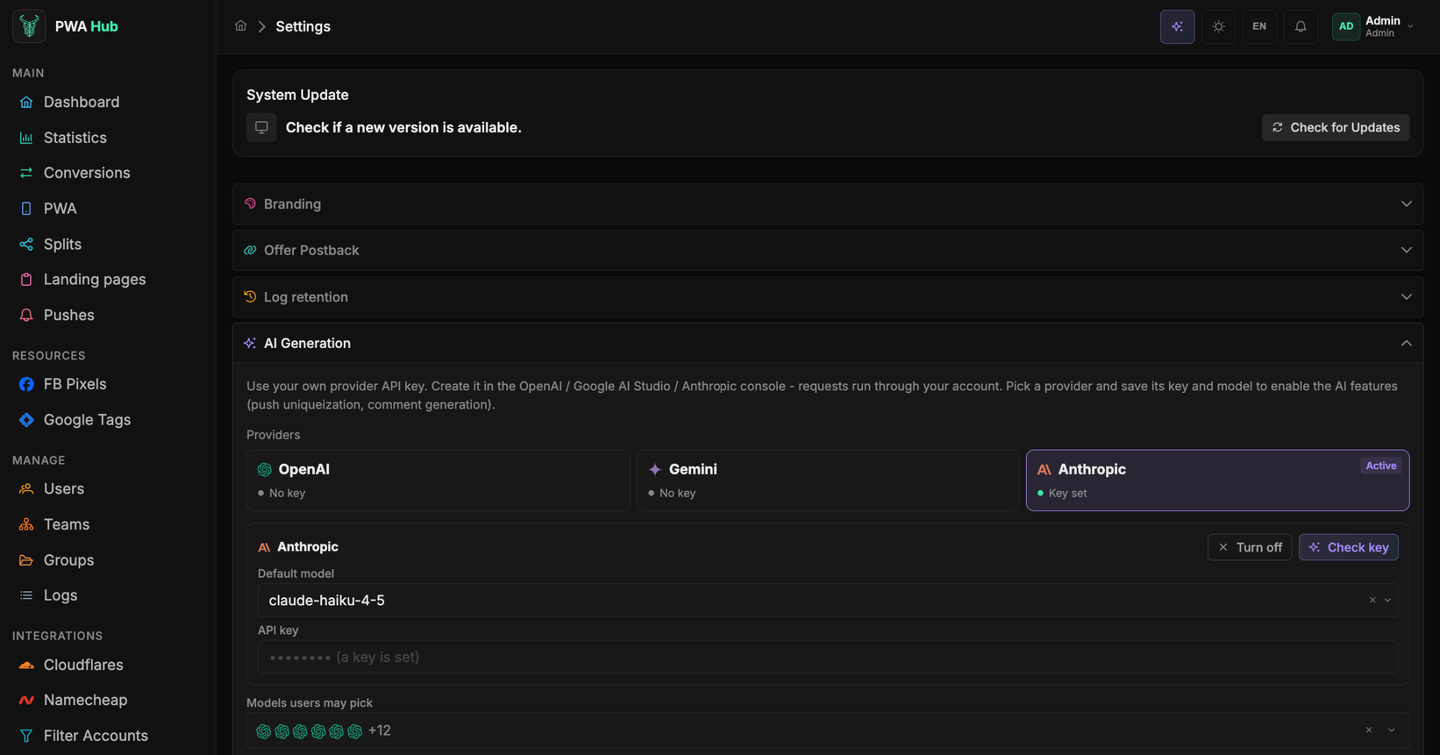
- Under Providers are three tiles - OpenAI, Gemini and Anthropic; each shows whether its key is set. Click a tile to open its settings: pick a Default model and enter the API key. The key is write-only: after saving, the field only shows that a key is set; leave it blank to keep the current one. The Check key button sends a short test request and shows right away whether the key works with the chosen model - before you save.
- To use a provider, click Make active in its settings - its tile gets the Active badge. Turn off disconnects AI without deleting the keys. While no provider is active or it has no key, the AI buttons in the panel reply that no model is connected - nothing else is affected.
- In Models users may pick, tick the models users can choose next to the price in the AI windows and the assistant chat. The active model is always there; a model of another provider works once that provider has a key.
- Below are the Prompt templates: one tab per AI feature - Comments, Pushes and Translation. Adjust them to your niche; the macros in the text (
{context},{tone}for comments,{from}and{to}for translation) are filled in by the panel. A blank field means the default template - which is shown in grey as a hint; a dot on a tab marks a prompt of your own.
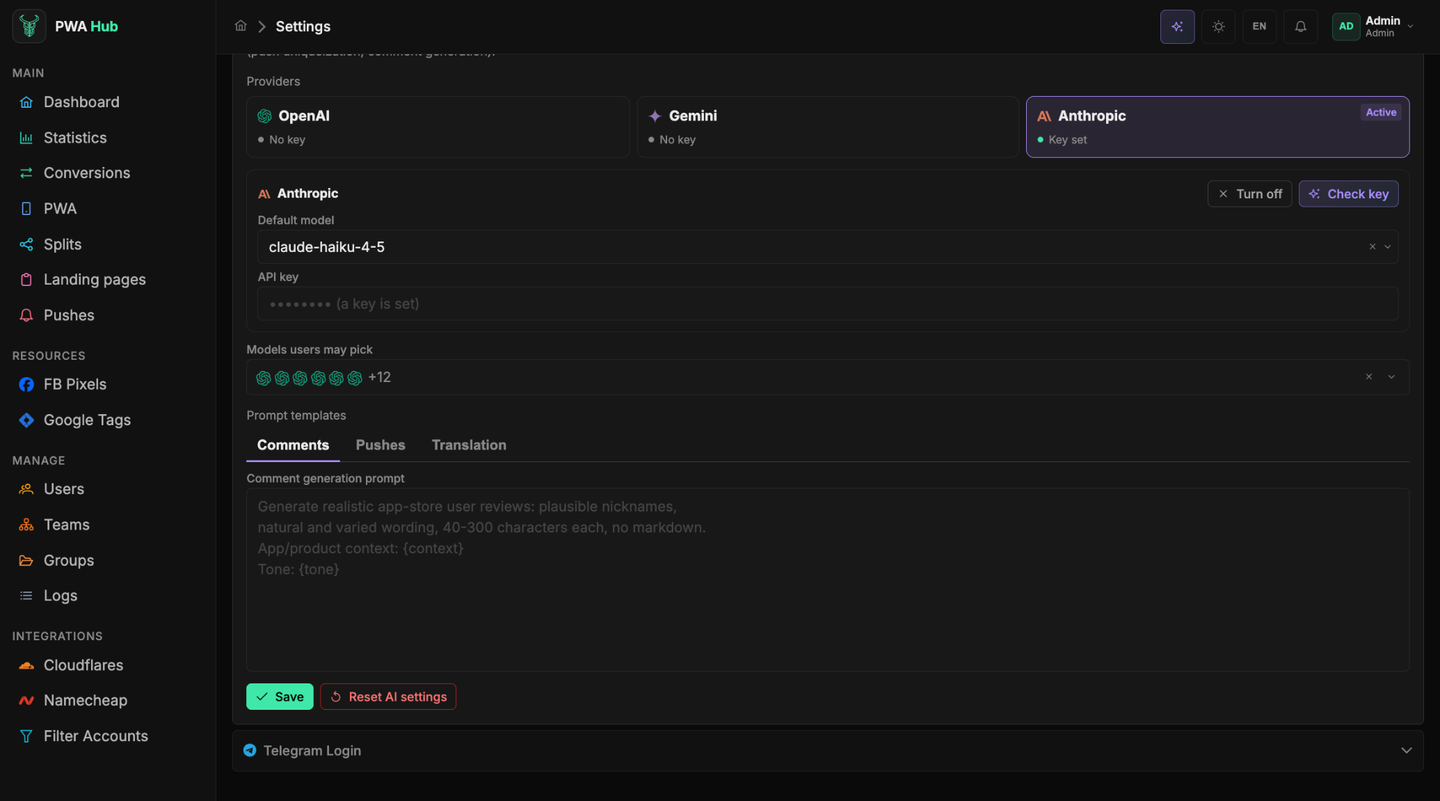
Click Save. The Reset AI settings button next to it restores everything at once - the provider, the models, the keys and the prompts; the panel asks before resetting.
Telegram Login
The Telegram Login card adds a "Log in with Telegram" button to the login page - handy if you or your team prefer to log in via Telegram instead of a password. The same bot enables the Telegram-linking card in user profiles.
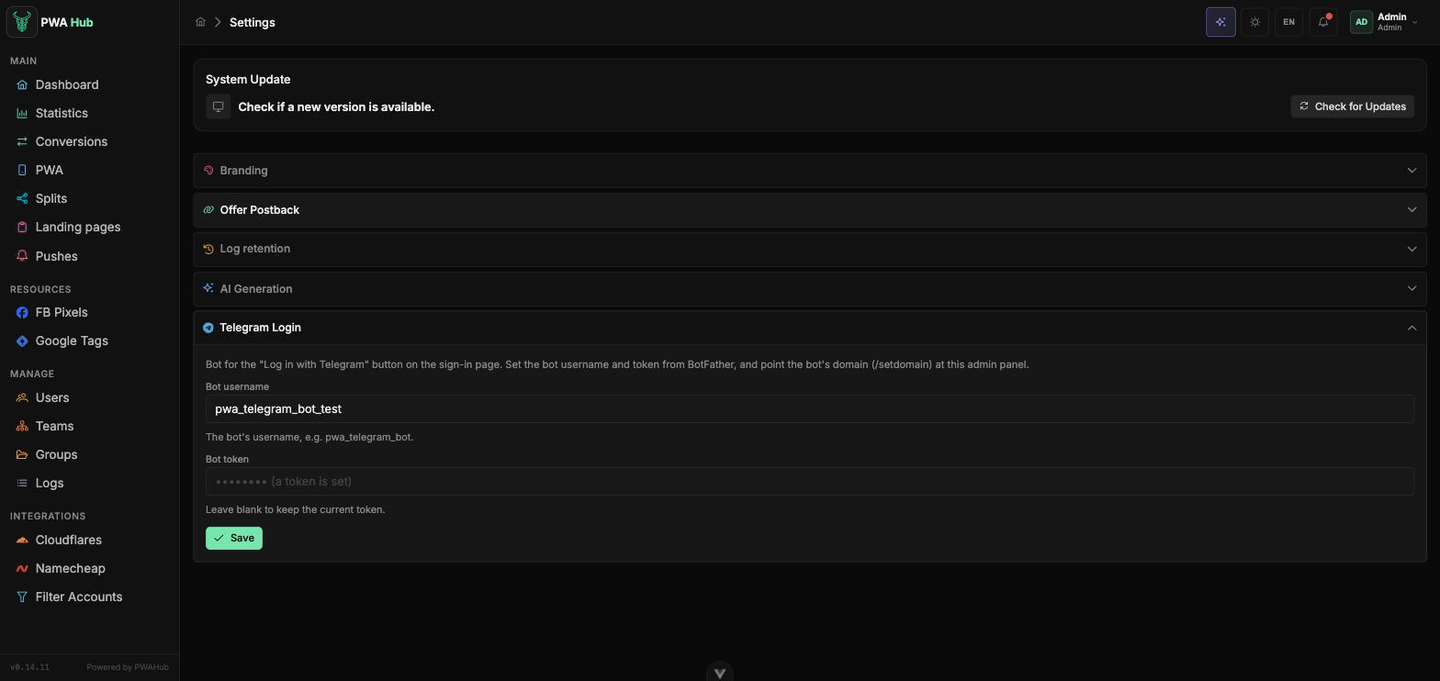
To enable it:
- Create a bot in @BotFather, get its username and token.
- Link your admin panel's domain to the bot with the /setdomain command in BotFather - the button won't work without this.
- Enter the username in the Bot username field and the token in Bot token, then click Save.
The token is entered once
The Bot token field is "write-only": if a token is already set, the field shows the a token is set hint. Leave it empty on your next save - the previous token stays in place. Fill in this field only when you want to replace the token with a new one.