
Domains and Cloudflare
PWA Hub manages the DNS of your domains itself through the Cloudflare API. As soon as you connect a domain to a PWA or split, the product creates a zone for it in Cloudflare (if it doesn't already exist) and proxied records pointing to your server's IP. For application domains you don't need to manually add A records - you just have to connect the account once. The only record you'll have to create by hand is the one for the panel's own domain (see below).
Everything works in the Full SSL mode: when PWA Hub is installed, a self-signed origin certificate is placed on the server, while Cloudflare terminates external HTTPS and communicates with your server over an encrypted channel. On top of that, the product automatically restores the visitor's real IP from the Cloudflare headers - in the statistics and logs you see the real addresses, not the proxy addresses.
What this gives you in practice
Once you've set up the Cloudflare account, you simply add domains in a couple of clicks afterwards - DNS, proxying, and HTTPS are configured for you.
What to prepare in Cloudflare
This part is done once in the external Cloudflare panel - before you install PWA Hub, because without DNS you won't be able to open the panel at all.
- Create an account at cloudflare.com (or use your own).
- Create an API Token with permissions for zones and DNS (how - right below). It must be a token, not the Global API Key - that's what you'll paste into the panel after the installation.
- At your domain's registrar, set the Cloudflare NS servers (Cloudflare will show them when you add the domain to your account). After changing the name servers, it will take some time for the zone to activate.
- In the SSL/TLS settings, set the mode to Full.
How to create an API Token
The token is created in your account profile, not in an individual domain's settings. Click the profile icon in the top-right corner of Cloudflare → My Profile, select API Tokens on the left, and click Create Token.
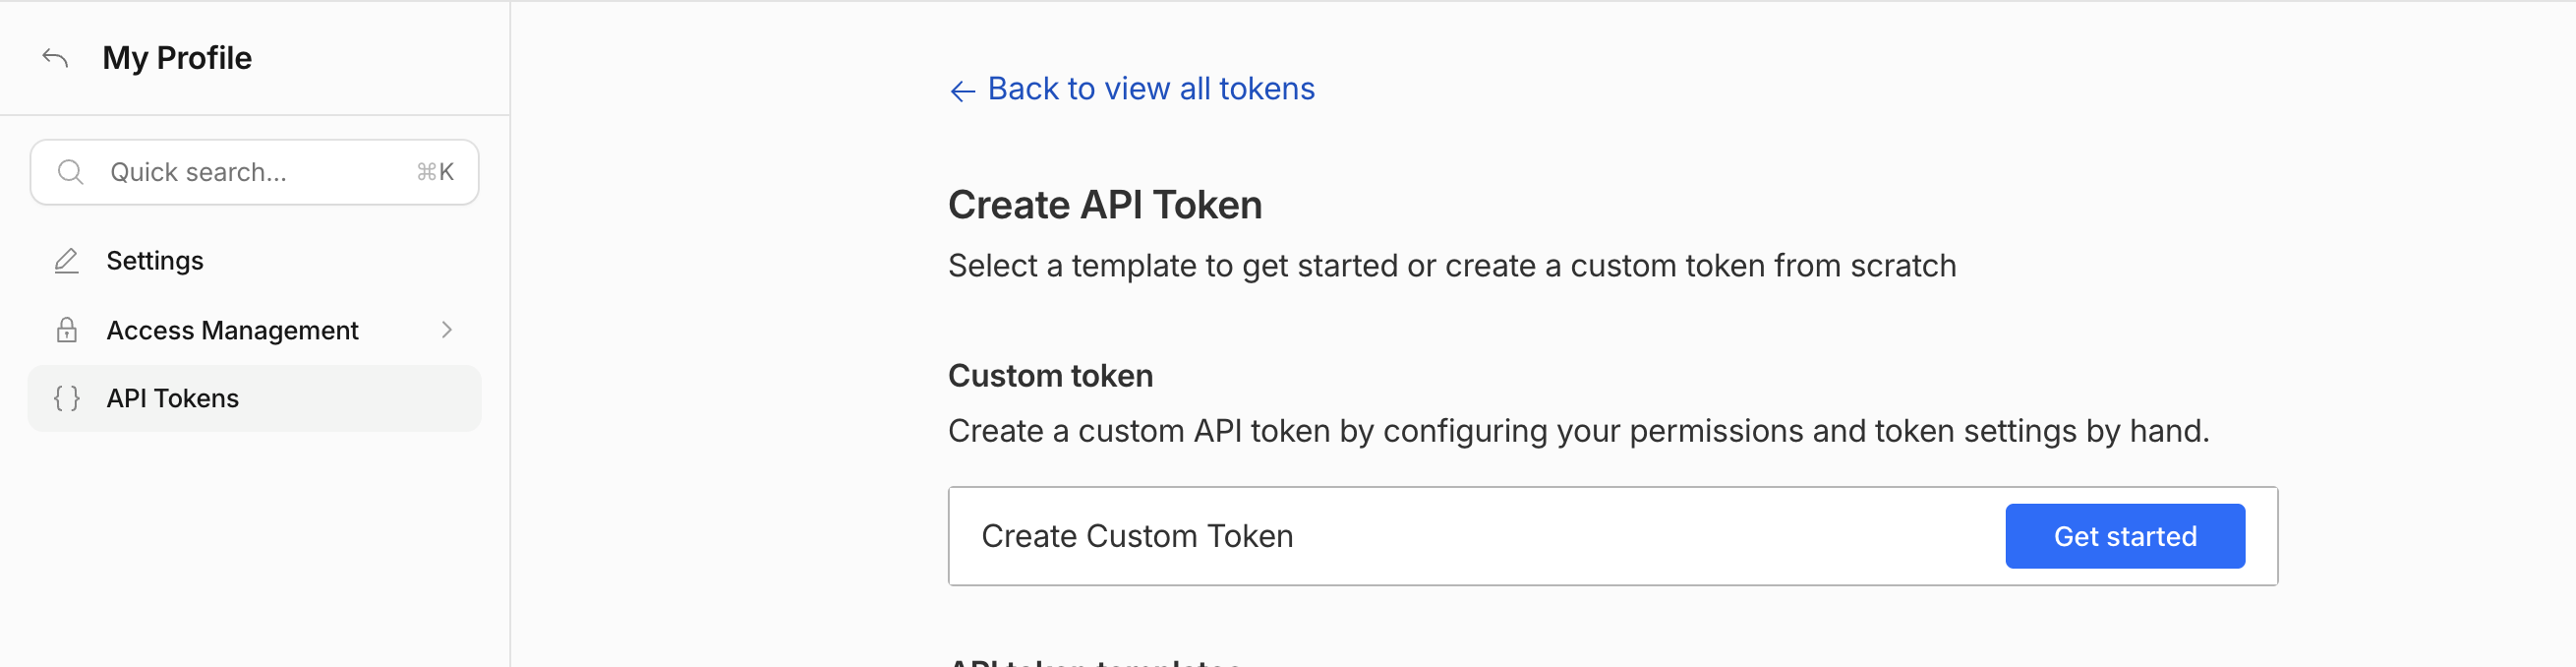
On the Create API Token page, scroll to the Custom token block and click Get started. The ready-made templates (Edit zone DNS, for example) won't do: they only grant permissions for records inside existing zones, while PWA Hub also creates the zones themselves.
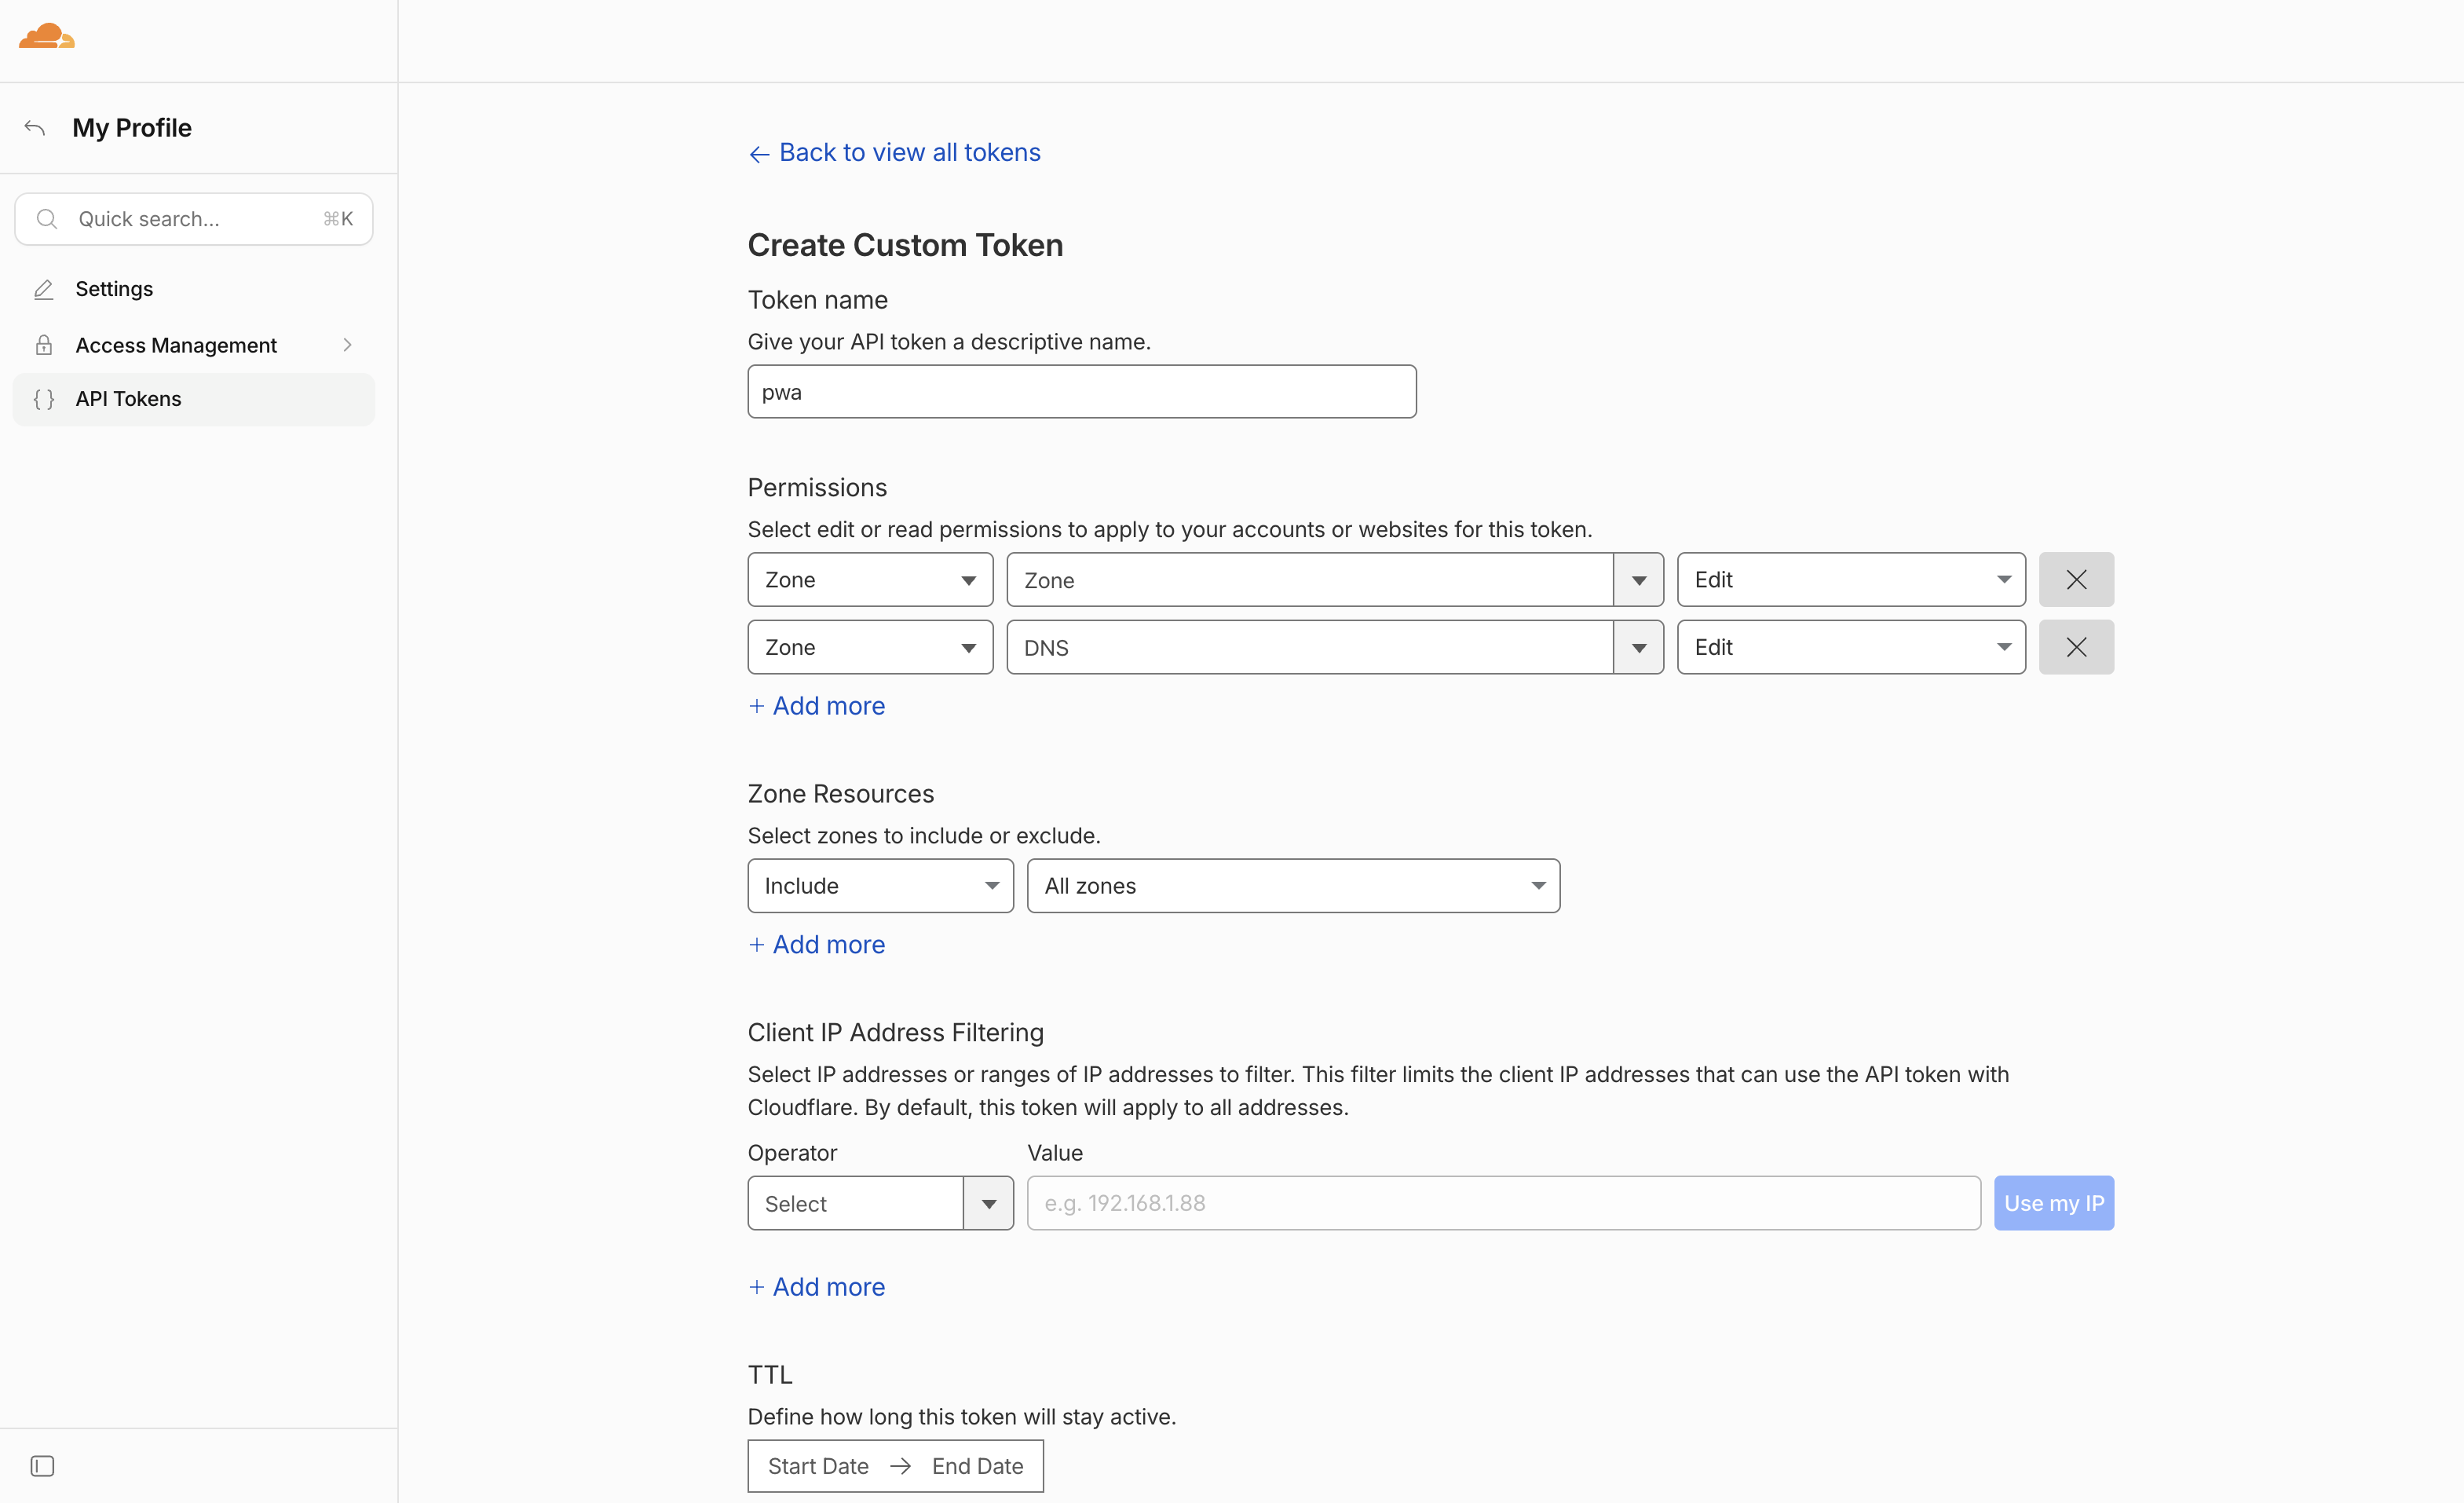
Fill in the Create Custom Token form:
- Token name - any name that makes sense to you, for example
pwa. - Permissions - two rows (add the second one with the + Add more link):
| Group | Resource | Level |
|---|---|---|
| Zone | Zone | Edit |
| Zone | DNS | Edit |
- Zone Resources - Include → All zones, so the token works with all the domains in the account, including those you add later.
- Client IP Address Filtering - leave it empty: if you restrict the token by IP, it will stop working after you move to another server.
- TTL - leave it empty so the token doesn't expire.
Click Continue to summary, check the list of permissions, and confirm with the Create Token button. Cloudflare shows the token value only once - copy it right away and keep it: you'll need it when you connect the account in the panel.
Why both permission rows are needed
Zone → DNS → Edit only lets you manage records inside zones that already exist. Zone → Zone → Edit is what allows PWA Hub to create a zone for a new domain from scratch. With the Read level instead of Edit, domains will not connect.
If zones aren't being created
In Zone Resources, instead of Include → All zones, choose Include → All zones from an account and specify your account - the token then gets account-level permissions, not just permissions for the zones that already exist.
If you lose the token
You can't view the value again. Open the API Tokens list and choose Roll in the token's menu - Cloudflare will issue a new value, and the old one stops working immediately. You'll need to paste the new value into the panel again, in the Cloudflares section (see “Cloudflare accounts”).
SSL mode must be Full
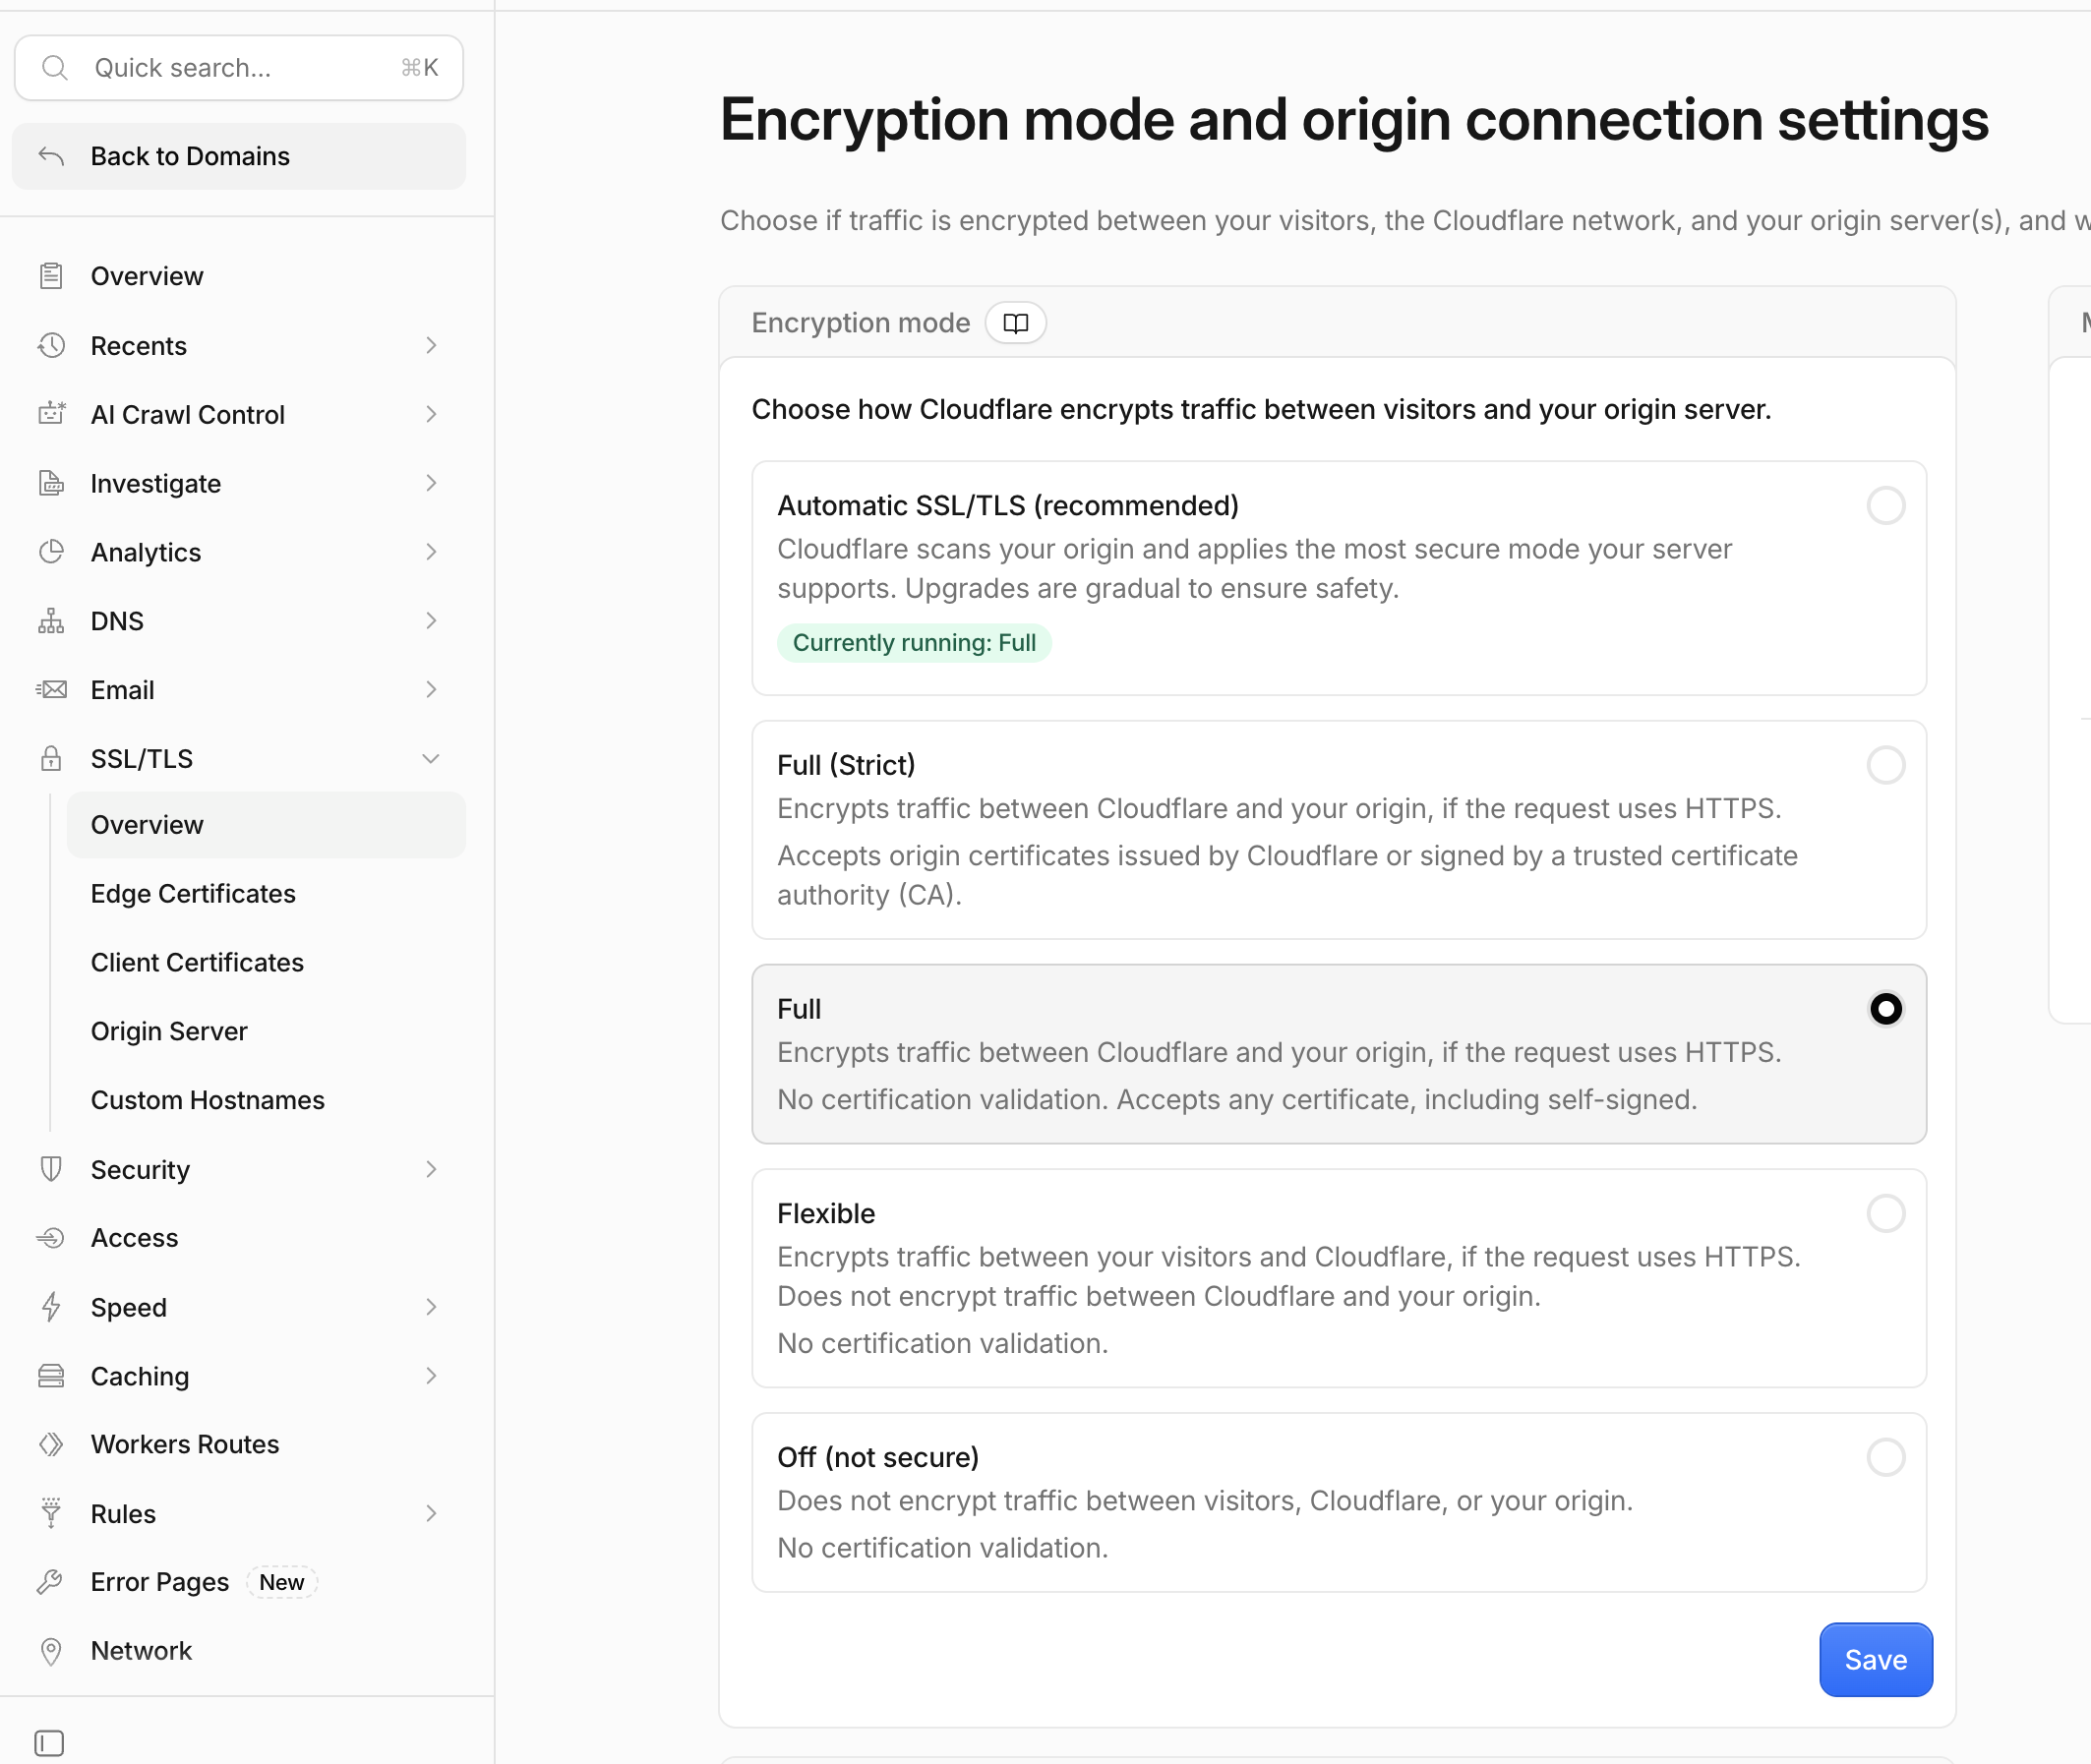
A self-signed certificate is installed on the server. With the Flexible mode, the connection to the server will go over HTTP, and with Full (strict) Cloudflare will require a trusted certificate and return an error. The correct option is exactly Full.
Open SSL/TLS → Overview - it shows the current encryption mode between the visitor, Cloudflare, and your server.
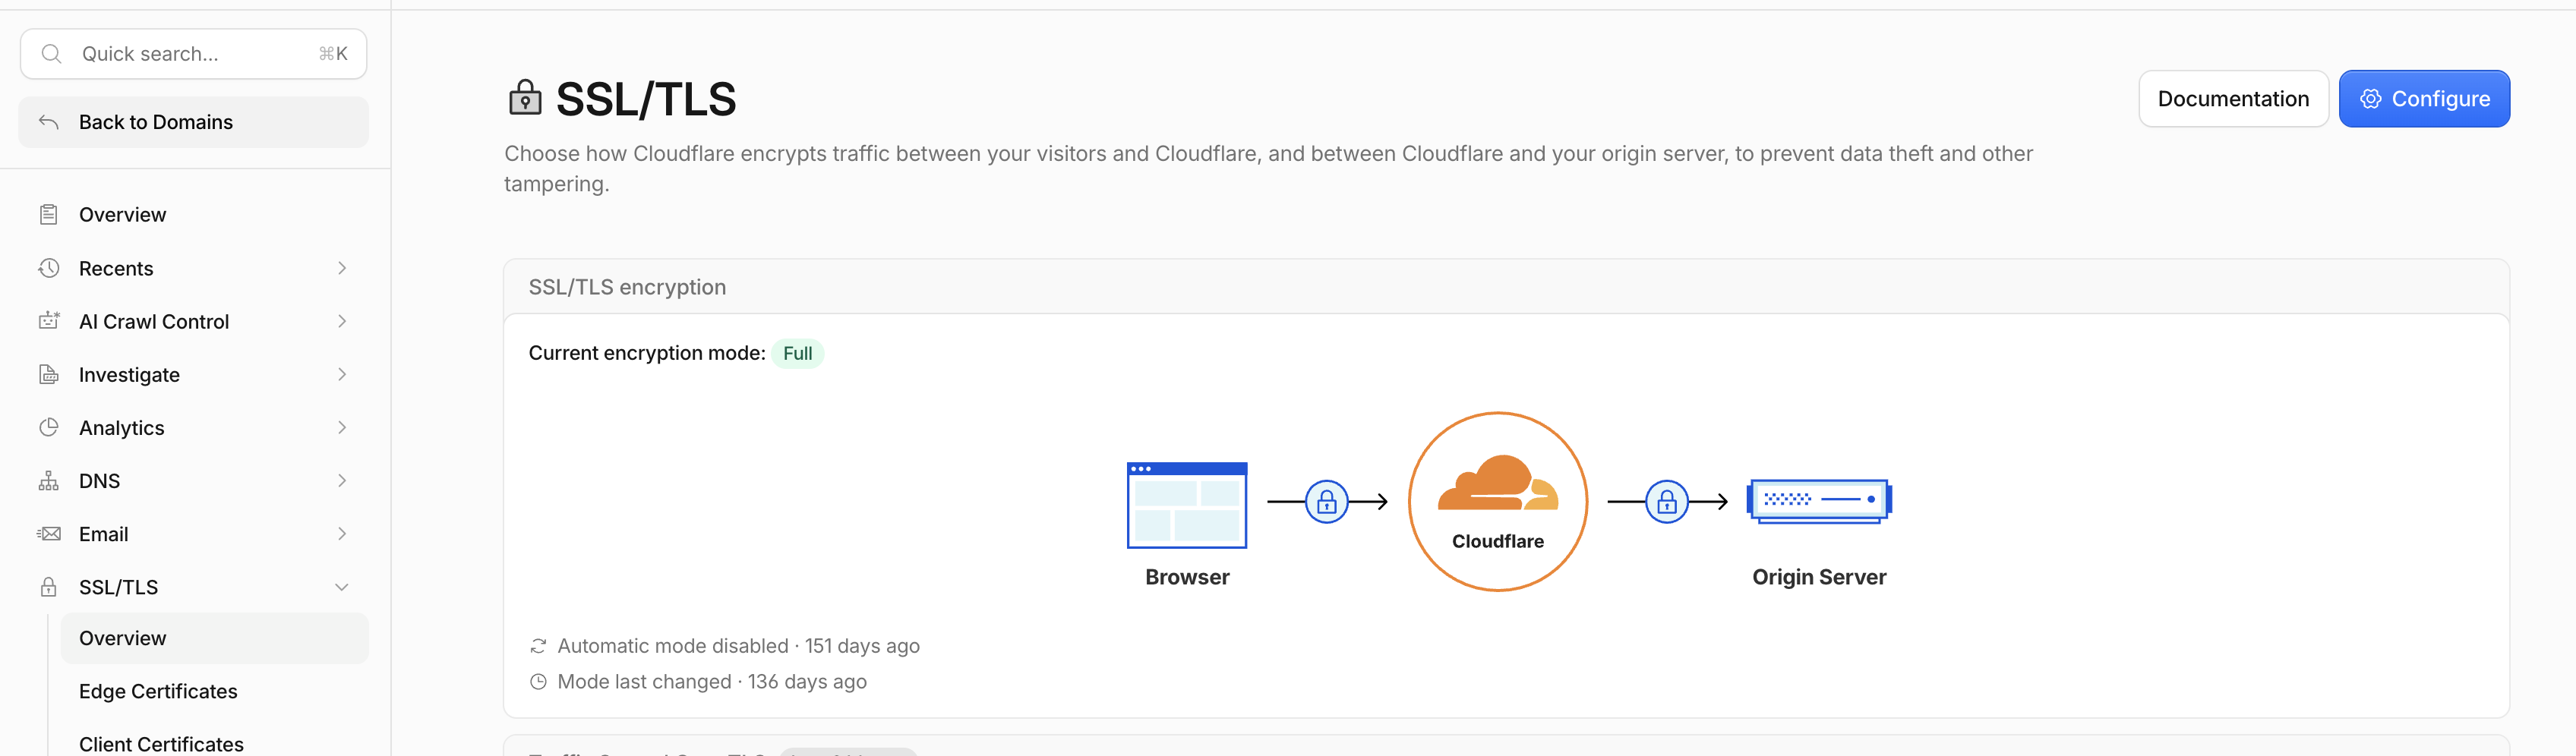
Click Configure, choose Full, and save with the Save button.
The record for the panel domain
You choose the panel domain yourself and enter it when activating the license: usually the admin.<your-domain> subdomain, but any other host or a separate domain works too. This DNS record has to be created by hand - without it the panel won't open after the license is activated. The product creates the domains for apps on its own later; this is the only record you create manually.
In the Cloudflare panel, open your domain, select DNS → Records on the left, and click Add record. Fill in the fields:
- Type -
A. - Name - the panel host name, for example
admin. - IPv4 address - your server's IP (the one you installed PWA Hub on).
- Proxy status - enable proxying (Proxied, orange cloud).
- TTL - leave
Auto.
Click Save.
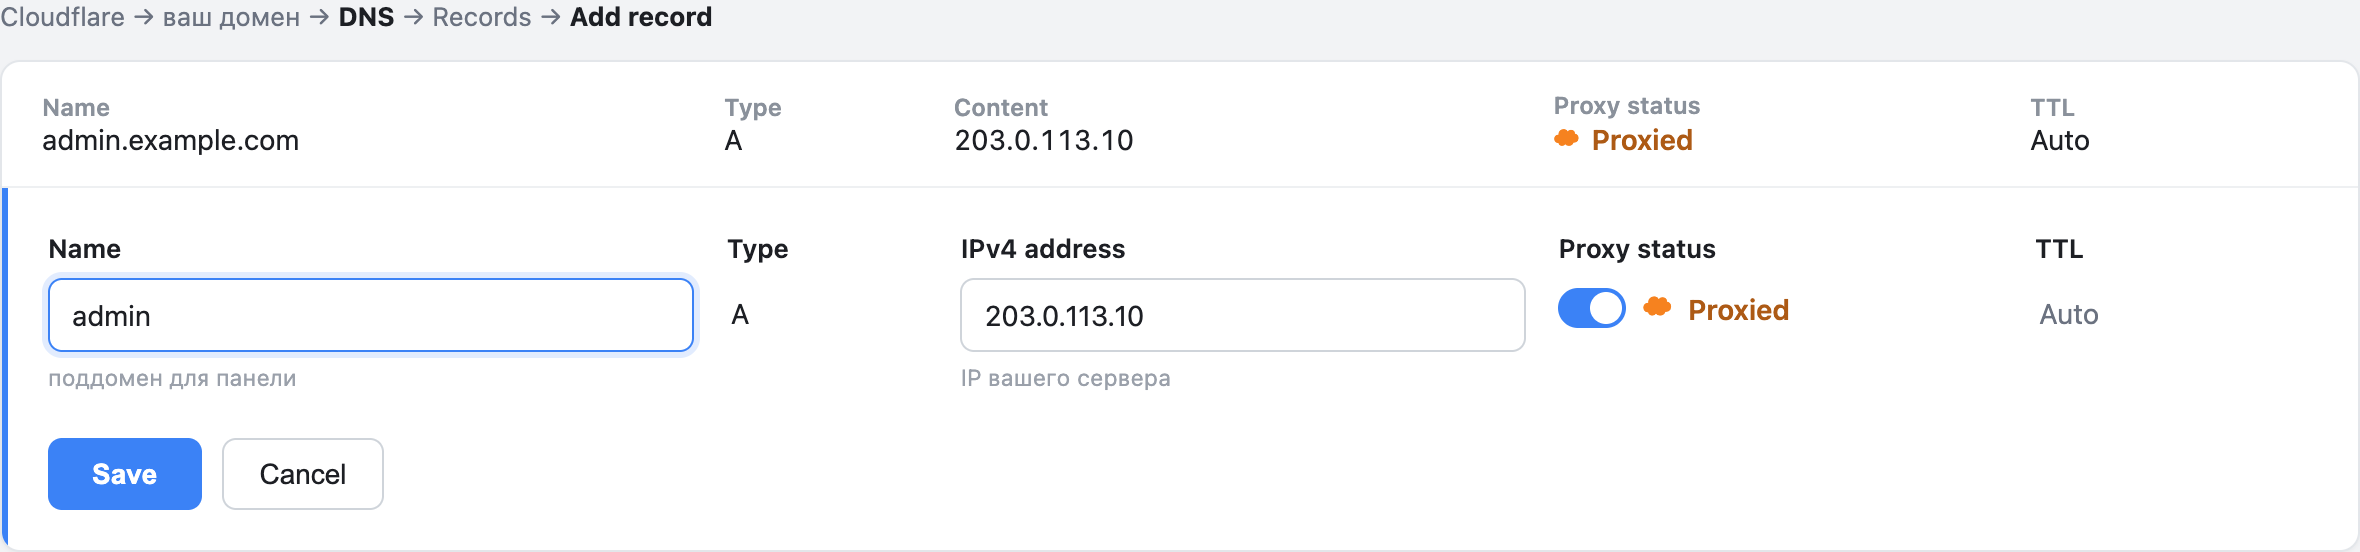
| Type | Name | Value | Proxy |
|---|---|---|---|
| A | the panel host, e.g. admin | your server's IP | Proxied (orange cloud) |
Root domain, optional
If you plan to use the domain itself as well (without admin), add the same A record for the root domain - in the Name field, enter @. Records in Cloudflare usually take effect within a minute, after which the panel domain starts resolving to the server.
Summary: what must be ready before the installation
- A Cloudflare account and an API Token with the Zone → Zone → Edit and Zone → DNS → Edit permissions on All zones - with the token value saved somewhere safe.
- The Cloudflare NS servers set at the domain's registrar, and the zone activated.
- The SSL/TLS = Full mode set in Cloudflare.
- An A record for the panel host (for example
admin) pointing at the server's IP, with proxying enabled.
Next you'll install PWA Hub (see “Install PWA Hub”), sign in to the panel by the server's IP, activate the license with this domain, and connect the Cloudflare account in the Cloudflares section - how to do that is described in “Cloudflare accounts”. After that the application domains are created automatically and you won't have to touch DNS by hand again.